
Learn how schedule Harvests, create and adjust Events, and Filter information.
Table of Contents
The web based Calendar is where leadership plans, and schedules the work that needs to be done with each Harvest in the grow. It's also where everyone else can see what's scheduled for a given month, week, or day.
There's many other things you can do in the Calendar - you can create Harvests, manage them, assign new Task Groups, assign work, and manage existing work.
Creating Harvests
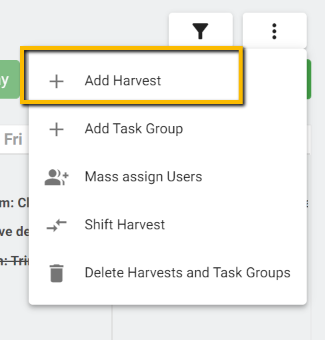
The first step to creating a schedule on the Calendar is adding each Harvest. To do this, in the upper right of the web app, click the menu:
Once clicked, you'll get a pop-up asking you for additional information on the Harvest you'd like to create. Which Template you'll reference, the Harvest name, and start date are mandatory. You can also choose to add different strains you'd like to run for each harvest:
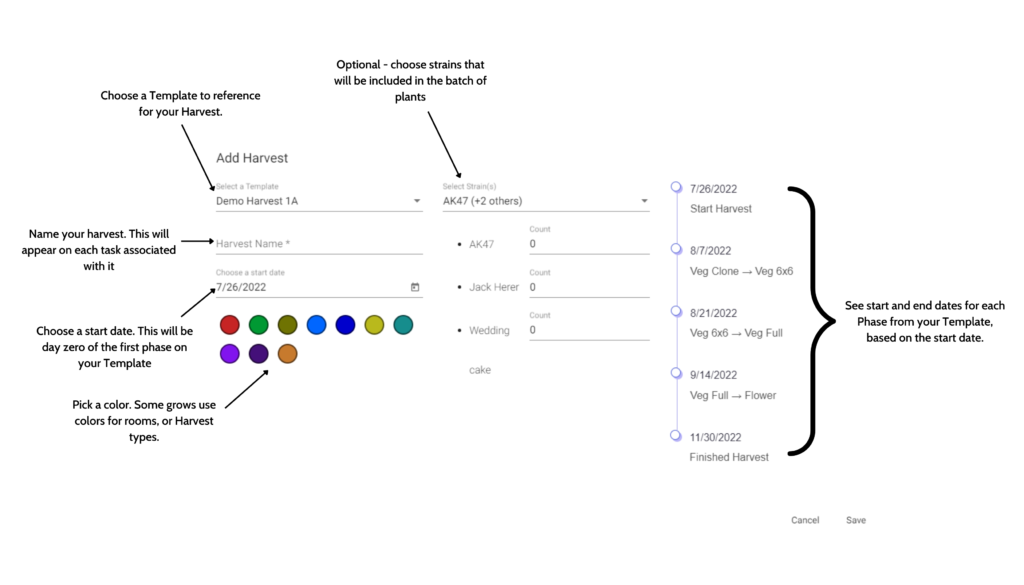
Once your new Harvest is saved, it will populate onto the Calendar, including the entire set of Events included from the Template used.
Adding additional Harvest Events
As we noted above, once a Harvest is scheduled, it will pull in every task from the Template, and populate it on the Calendar starting from your chosen date. It's important to note: you must create a Template in order to create a Harvest. A Harvest must reference a Template.
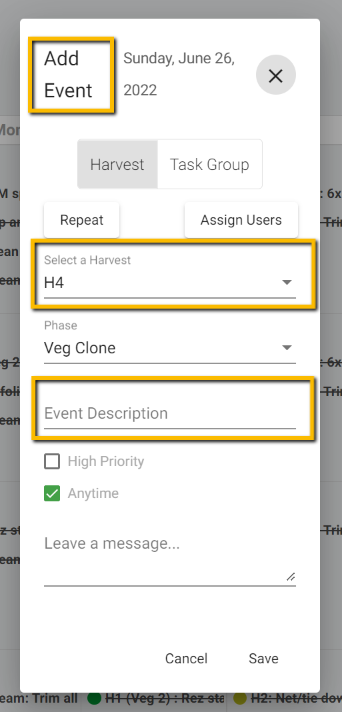
After a Harvest is created however, you can then add additional Harvest Events as needed on the Calendar by clicking in the empty grey space on the day you'd like to schedule the Event. You can see the date, and the Harvest the Event is associated with below.
Be sure to add a description so everyone knows what needs to be done!
For a more in depth article on Events, click here.
Task Groups
There are two classifications of Events in PlanaCan - Harvest Events, and Task Group Events. We just went over Harvest Events above.
Task Groups, by definition, are events that happen grow-wide, and aren't specific to an individual Harvest.
To create a Task Group, go to the same menu that you create Harvests from in the upper right, then you'll be able to choose the Task Group type:
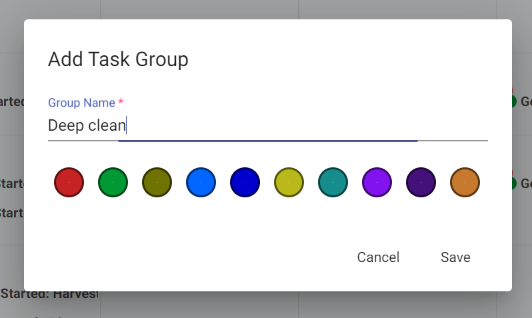
Once a Task Group is created, you can then add Events on the Calendar associated with the Task Group:
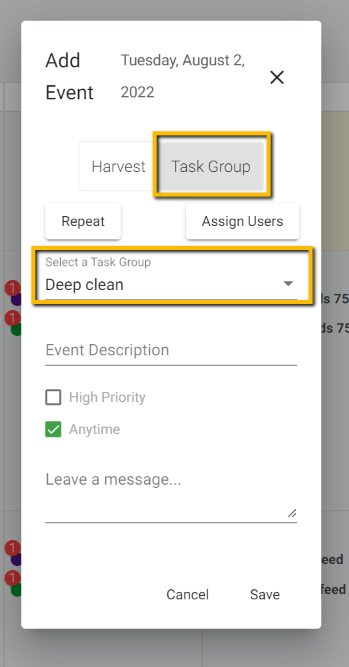
For each Task Group Event, you can choose to repeat it at daily, weekly, or monthly intervals. You can also choose the duration of the repetition - this is very similar it google calendar.
An example of a Task Group might be a cleaning, a managers meeting, or an IPM spray happening for more than one Harvest at a time.
Whatever you choose, know that the Events associated with a task group won't appear in the list of Harvest Events in the Harvest Detail screen. They are designed to be separate, so they don't confuse the specific Harvest data tied to each batch of plants.
Moving Events - drag and drop
It's one thing to schedule Harvests, but once created, being able to adjust and move Events as things change day to day in the cultivation is just as important. The easiest way to shuffle Events is to simply drag and drop from one day to the next:
Shifting Harvests
If you need to move more than one Event, you can Shift multiple Harvests at once. This is useful for when you might leave a group of plants in Veg for a few days, or have some other issue that affects schedules for multiple Harvests in your cultivation.
When Shifting Harvests, you can choose how many Harvests you'd like to shift, the number of days, and from which start date:

Filtering the Calendar, and Saved Views
Once your Harvests are scheduled, there can be a lot of information to look at on the Calendar. Filtering out what you don't want to see with each of our Filter sets, becomes an important part of managing your schedule efficiently.
In that spirit, you can also bookmark a Saved View, based on the selection you've made to the Filters. After a Saved View is created, you can quickly reference it anytime you want to view the set of Filters previously selected.
Below is a screenshot detailing all the different parts of the Filter. As you can see, you can view schedules for different individual Harvests, Users, Phases, etc. The Saved View icon is called out:


