Are you harvesting your cannabis at the right time? The timing and process of your cannabis harvest make all the difference in potency, flavor, and overall quality. You have spent weeks nurturing your plants, carefully monitoring their growth, adjusting their nutrients, and protecting them from pests. But as harvest time approaches, making the wrong move can reduce all your hard work to a subpar final product.
Harvesting too early results in weak potency and undeveloped flavors, while harvesting too late can lead to overly sedative effects and degraded cannabinoids. Rushing through the drying process can leave you with harsh smoke, and improper curing can invite mold or stale-tasting buds.
If you want smooth, flavorful, and high-quality cannabis, you need to pay attention to every detail, from knowing the right time to cut your plants to long-term storage. This guide will walk you through the best cannabis harvest tips, ensuring that your final product is something you can truly be proud of.
Steps to Harvest Cannabis Properly
Harvesting cannabis isn’t just about cutting down plants. It’s about timing, technique, and post-harvest care to maximize quality. Rushing the process can lead to harsh smoke, reduced potency, and poor flavor. Here’s how to do it right:
Step 1. Timing the Cannabis Harvest
Harvesting at the right time maximizes potency, flavor, and quality. If you cut too early, THC levels won’t be fully developed. If you wait too long, THC breaks down into CBN, which produces a more sedative effect. Follow these steps to get the timing just right.
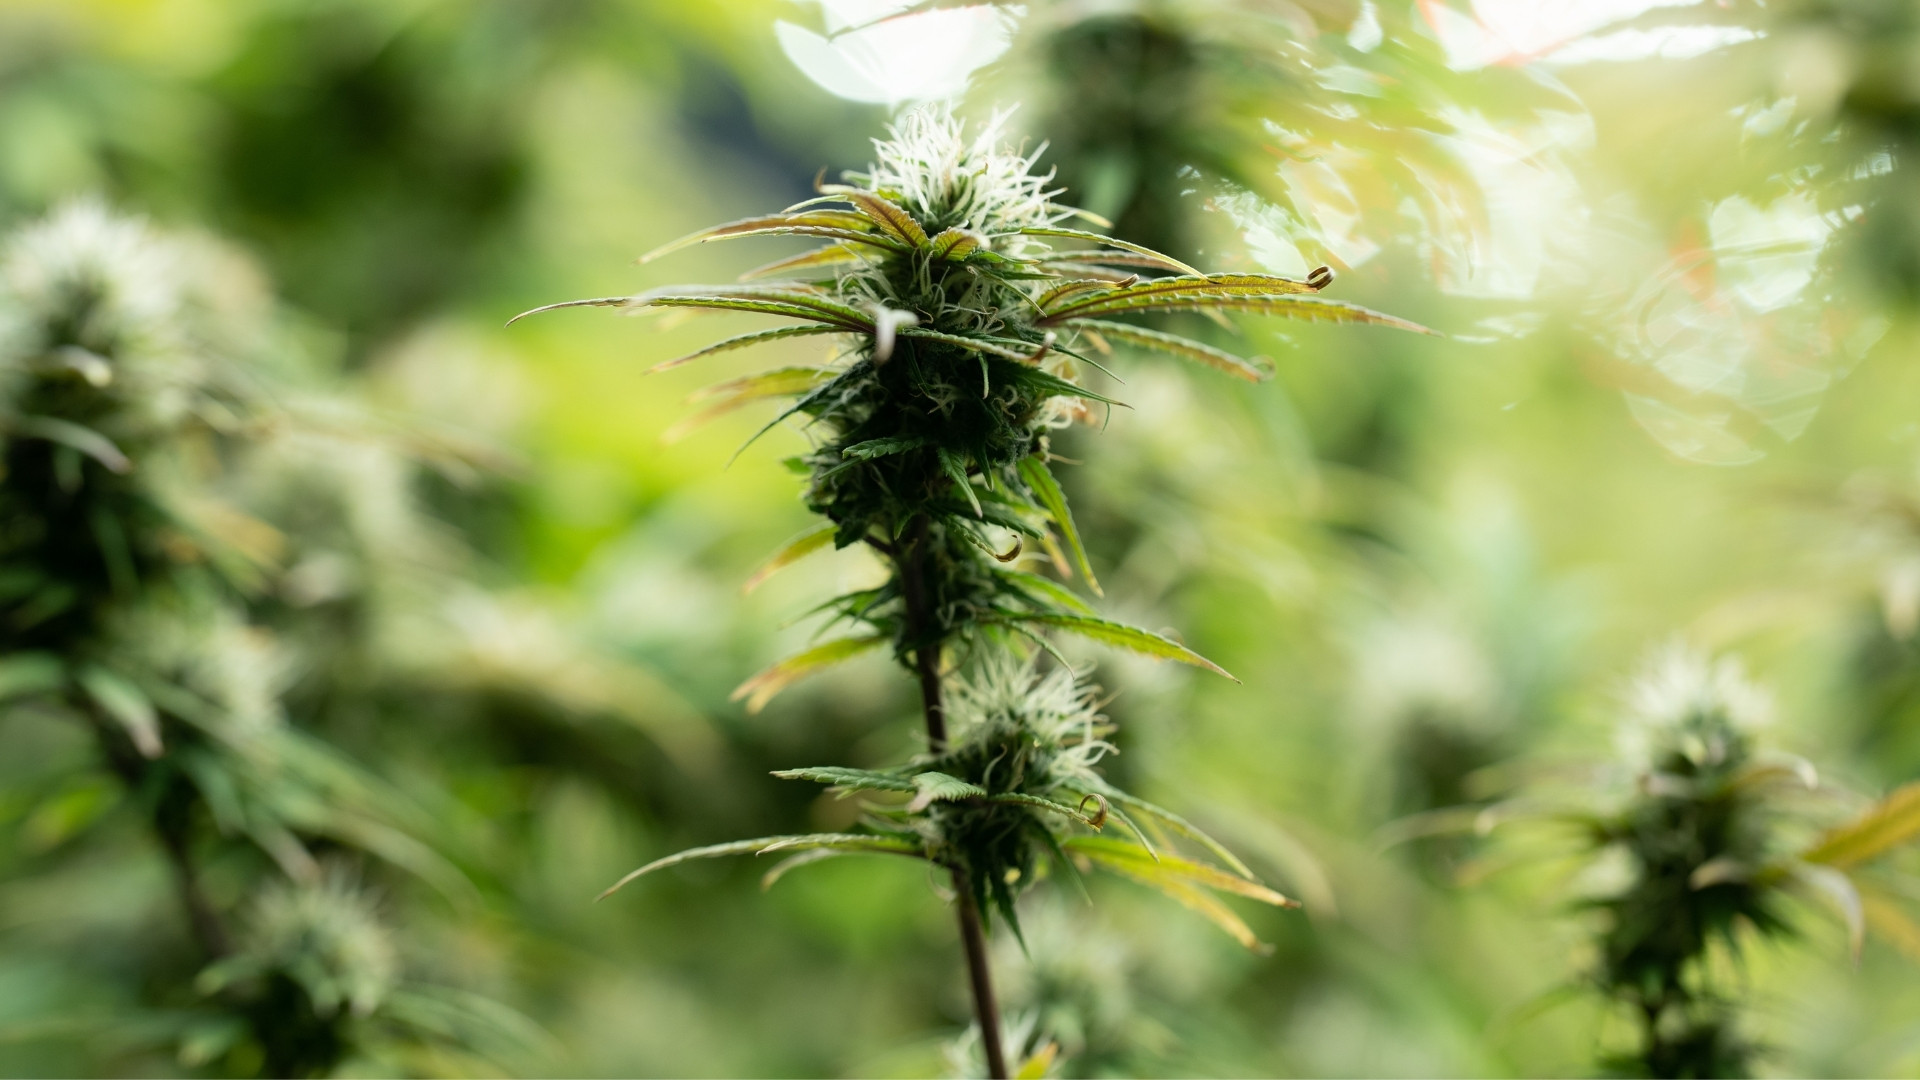
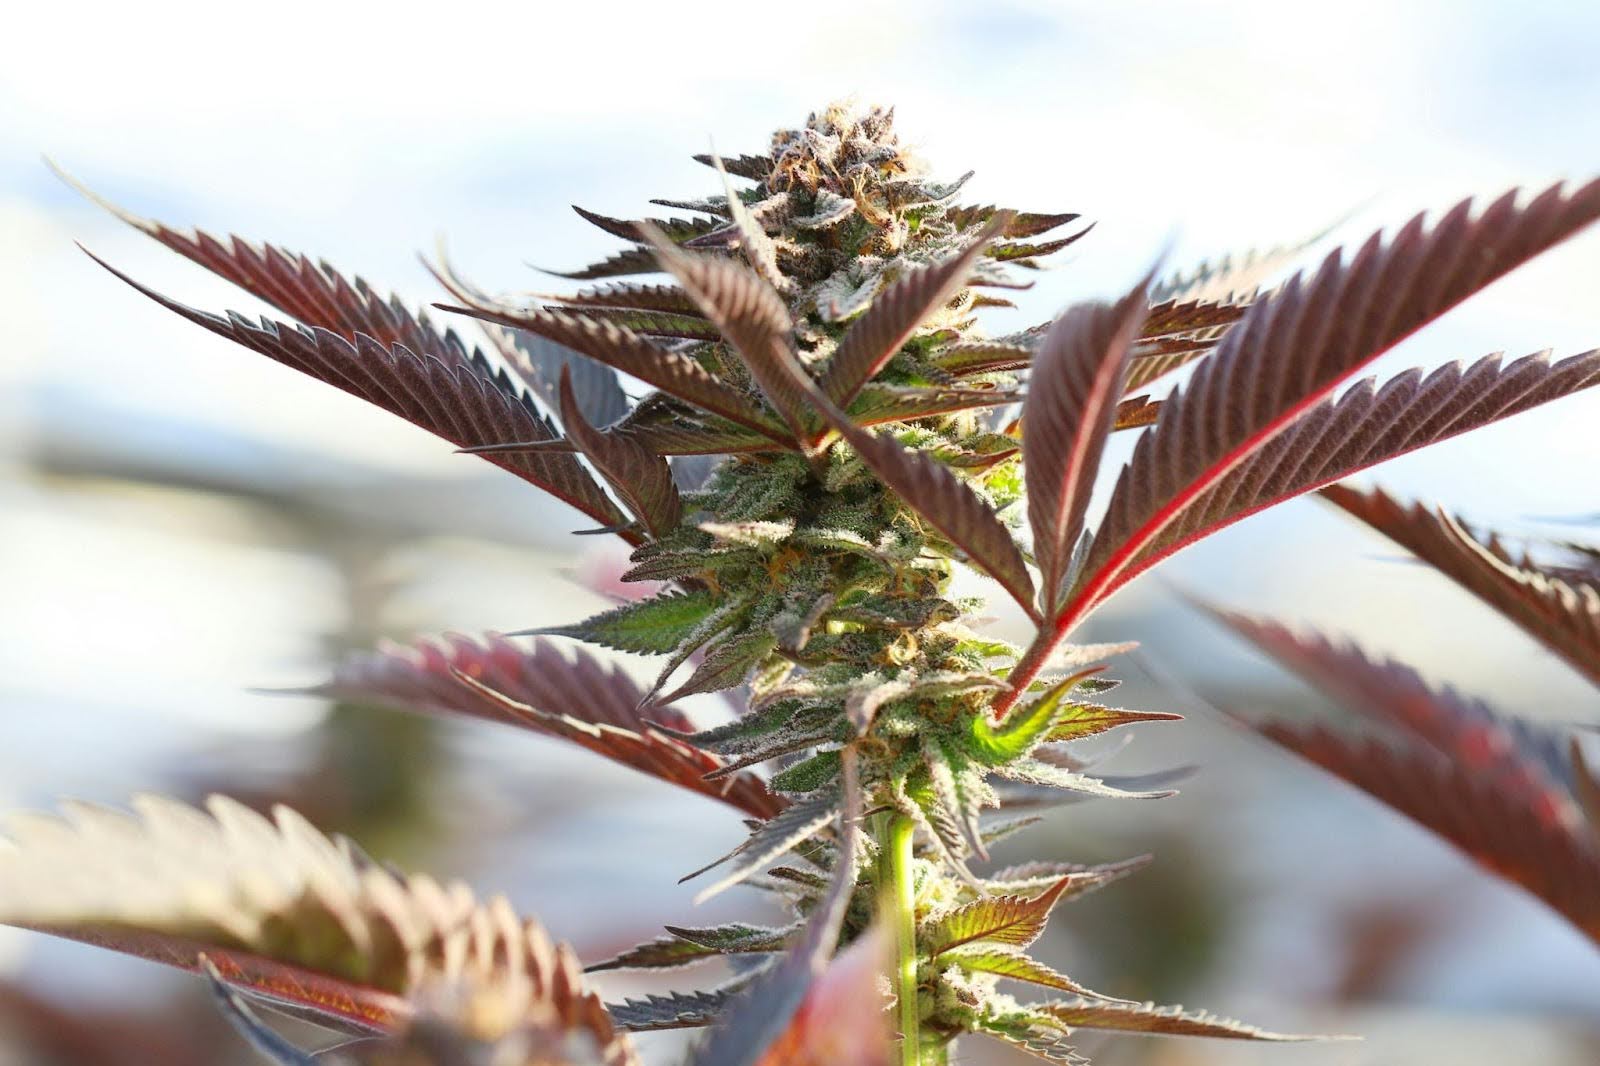
1. Watch the Trichomes
Trichomes, the tiny, crystal-like structures on your buds, are the best indicator of ripeness. Use a jeweler’s loupe or digital microscope to check their color:
- Clear trichomes: Harvesting now is too early; potency hasn’t fully developed.
- Milky white trichomes: This is the peak THC stage, offering maximum potency. Ideal for most growers.
- Amber trichomes: THC is breaking down into CBN, resulting in a more sedative, body-relaxing effect.
Note: A good balance is around 70% milky and 30% amber for most strains.
2. Check the Pistils
Pistils are the tiny, hair-like structures on your buds. Your plant is likely ready when 70 to 90% turn orange or brown. However, trichomes are the most reliable indicator.
3. Watch Your Fan Leaves
Your plant gives more signs of ripeness beyond just trichomes and pistils:
- Lower fan leaves may start yellowing as the plant redirects energy to the buds.
- Sugar leaves remain frosty, but excessive yellowing could mean you’re waiting too long.
4. Flush Before Harvest
If you’re using nutrients, flushing your plants with plain water for one to two weeks before harvest removes excess salts and minerals, leading to smoother smoke and better flavor.
5. Consider the Strain and Effects You Want
- Energizing high: Harvest when most trichomes are milky.
- Balanced effect: Aim for a mix of milky and amber trichomes.
- Relaxing, sedative high: Wait until more trichomes turn amber.
6. Maintain the Right Environment
In the final weeks before harvest, temperature and humidity play a big role:
- Too much heat (above 80°F or 27°C) can degrade THC.
- High humidity can increase the risk of mold.
- Stable conditions help preserve potency and bud quality.
7. Try a Period of Darkness
Some growers give plants 24 to 48 hours of darkness before cutting them down, believing this boosts resin production. While not essential, this trick is easy to test.
8. Harvest at the Right Time of Day
Cut your plants early in the morning before the lights turn on when cannabinoid levels are at their peak. With PlanaCan, you can stay on top of key tasks like this by using a clear visual timeline to plan and track your cultivation process. It helps you schedule work months in advance while managing daily activities with a flexible calendar that allows adjustments. By centralizing information, PlanaCan ensures everyone knows what needs to be done so no task is overlooked.
Step 2. Cannabis Harvesting Techniques
Harvesting is one of the most crucial steps in the cannabis cultivation process. The techniques you use can impact not just the yield but also the potency, flavor, and overall quality of your buds. Here’s a breakdown of the best techniques to ensure a successful harvest:
1. Whole-Plant Harvest
Cut the plant at the base and hang it upside down to dry. This method is best for small plants and ensures an even drying process, but requires adequate space.
2. Branch-by-Branch Harvest
Harvest one branch at a time, especially if different plant parts ripen at different rates. This allows for better control over drying conditions.
3. Bud-by-Bud Harvest
For maximum precision, cut individual buds when they reach peak ripeness. This method is useful for large-scale growth or plants with uneven maturation.
4. Staggered Harvesting
Harvest the top buds first and give the lower buds more time to mature before cutting them down. This maximizes yield and ensures all buds reach their full potential.
5. Wet Trimming vs. Dry Trimming
- Wet Trimming: Trim off fan and sugar leaves immediately after harvest. It speeds up drying and reduces mold risk but requires more upfront work.
- Dry Trimming: Hang the plant or branches to dry first, then trim. This method helps preserve terpenes and results in smoother smoke.
6. Hand Trimming vs. Machine Trimming
- Hand Trimming: More precise and preserves trichomes, but labor-intensive.
Tools & How to Use Them:
- Trimming scissors – Sharp, spring-loaded scissors help cut sugar leaves without damaging buds.
- Gloves – Prevents resin from sticking to hands.
- Trim tray – Collects trimmings for extracts or edibles.
- Isopropyl alcohol & cloth – Cleans sticky scissors for smooth cutting.
How to do it: Hold the bud by the stem, carefully snip off excess leaves, and shape it neatly.
- Machine Trimming: Faster for large harvests but may damage delicate buds.
Tools & How to Use Them:
- Automatic trimming machine – Spins or tumbles buds to remove excess leaves.
- Cleaning brushes & lubricants – Maintains efficiency and prevents resin buildup.
- Collection bags – Gather leftover trim for later use.
How to do it: Remove large fan leaves, place buds into the machine, and adjust settings for optimal trimming.
7. Cold vs. Warm Harvesting
- Cold Harvesting: Keeping temperatures below 65°F helps preserve terpenes and potency.
- Warm Harvesting: This can speed up drying but may degrade flavor and aroma.
8. Water-Only Flushing Before Harvest
Flushing plants with plain water for 7–14 days before harvest removes excess nutrients, leading to a cleaner, smoother smoke.
9. Keep a Harvest Journal
Track harvest date, trichome color, drying time, and curing results to refine your process. PlanaCan provides a clear timeline for scheduling and tracking tasks. Plan months ahead while managing daily activities with a flexible calendar that adapts to changes. Centralizing information keeps everyone aligned and ensures no task is missed.
Step 3. Setting Up Your Cannabis Drying Room
Getting your drying room right is just as important as the growth itself. This stage determines the final quality of your cannabis, affecting potency, flavor, and smoothness. A properly set-up drying room helps preserve terpenes and cannabinoids, giving you a better overall product. Here’s what you need to know:
1. Choose the Right Space
You need a dark, well-ventilated room with controlled temperature and humidity. A spare room, basement, or dedicated grow tent can work. Just make sure it is sealed to prevent contaminants.
2. Control Temperature and Humidity
Keep your room between 60 and 70°F (15 to 21°C) with 50 to 60 percent humidity. If the temperature is too high, buds dry too fast, degrading terpenes. If the humidity is too high, you risk mold. Use a hygrometer and thermostat to monitor conditions.
3. Set Up Airflow
Good air circulation prevents moisture buildup. Use oscillating fans to keep air moving, but never blow air directly on your buds. A small exhaust fan can help remove excess moisture without drying too quickly.
4. Hang or Rack Your Buds
Hanging whole branches upside down allows for even dryness. If space is limited, mesh drying racks work, too. Just make sure buds have enough space for proper airflow.
5. Keep It Dark
Light degrades cannabinoids, so keep the room dark. If you need to check on your buds, use a green light, which will not affect potency.
6. Monitor and Adjust Daily
Check your drying buds daily. They're ready for curing if they feel crispy outside but slightly soft inside. PlanaCan eliminates guesswork by tracking plant conditions and capturing data from every harvest. With all insights in one place, you can refine your methods for higher yields and bigger profits.
Step 4. Cannabis Drying and Trimming
You’ve put in weeks or even months of effort to grow healthy, high-quality cannabis. How you dry and trim your buds directly impacts their potency, flavor, and overall smoking experience. Rushing this stage can lead to harsh, ineffective cannabis, while a careful approach will bring out the best in your harvest. Here’s how to do it right:
1: Drying Your Cannabis
After harvest, your buds need controlled drying to prevent mold and protect terpenes.
- Hang or rack your buds in a dark, well-ventilated space. Keep the temperature between 60 and 70°F (15 to 21°C) and humidity at 50 to 60 percent.
- Use gentle airflow to prevent stagnant air, but do not point fans directly at the buds.
- Keep the drying area dark because light degrades THC and reduces potency.
- Handle buds as little as possible to avoid knocking off trichomes.
- Check for mold daily. Watch for musty smells or white fuzz.
- After 7 to 14 days, test the stems. The buds are ready for the next step if they snap instead of bending.
2: Trimming for Quality
Trimming removes excess leaves and shapes your buds for the best appearance and experience.
- Decide on wet or dry trimming:
- Wet trimming happens right after harvest and speeds up drying. It also results in a cleaner look.
- Dry trimming happens after drying and helps preserve terpenes, but it can be messier.
- Use sharp trimming scissors for precision.
- Wear gloves to prevent sticky resin buildup on your hands and tools.
- Save your trim. Sugar leaves contain cannabinoids and can be used for edibles, hash, or concentrates.
- Take breaks. Trimming is time-consuming, and tired hands lead to sloppy work.
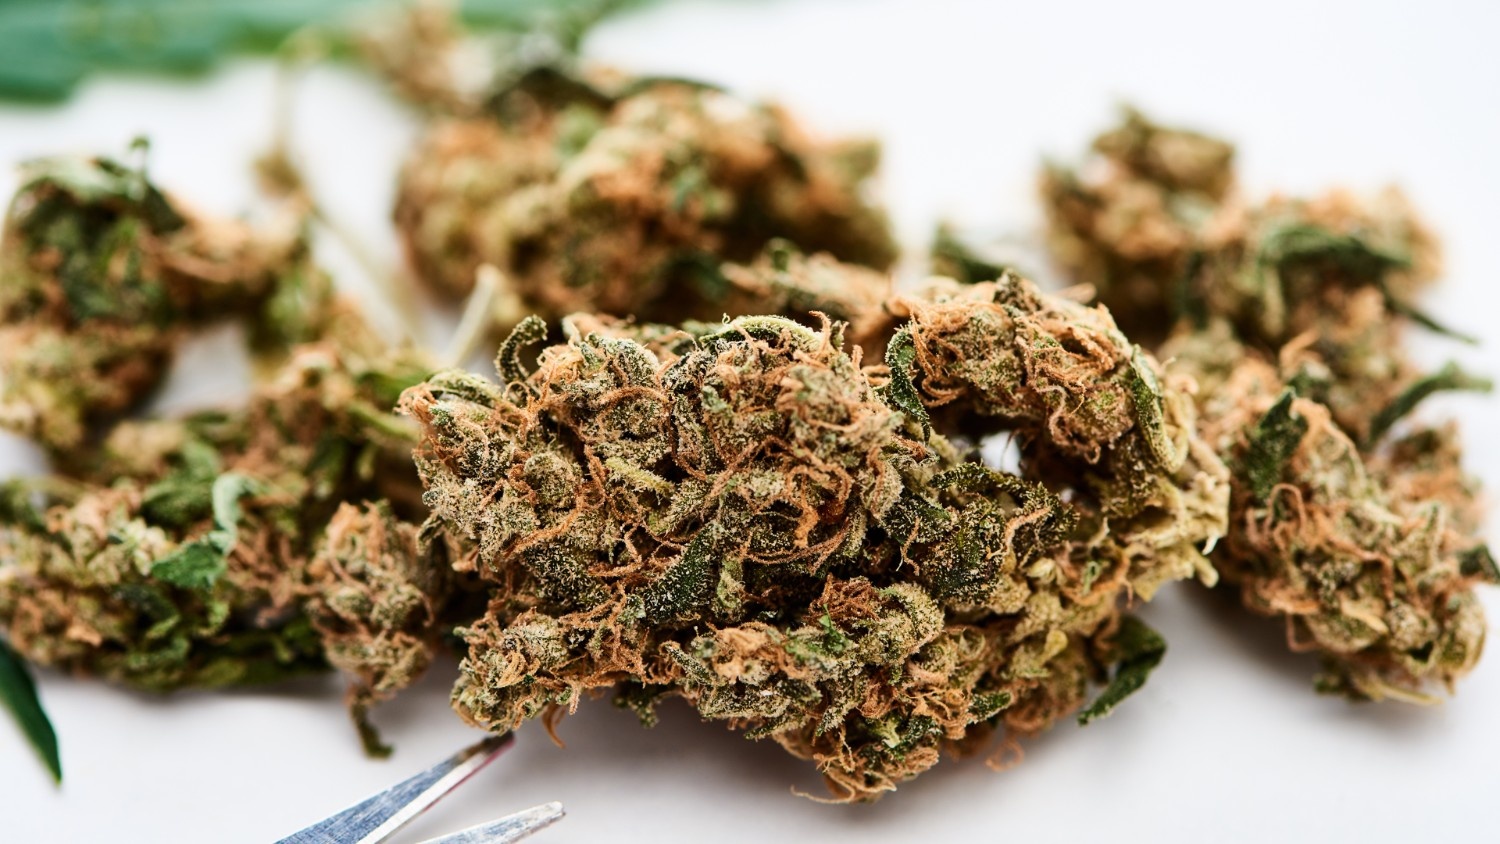
3: Curing for Maximum Potency
Once trimmed, your buds need curing to bring out their full potential.
And here’s the next step on how to cure your cannabis properly.
Step 5. Curing Your Cannabis
Curing helps preserve potency, enhances aroma, and prevents mold. Rushing this step can ruin your harvest, so take your time and do it right. Here’s how.
1: Store in Jars
Place dried buds in airtight glass jars, filling them about three-quarters full to allow some airflow. Store the jars in a cool, dark place.
2: Burp the Jars
For the first two weeks, open the jars once or twice daily for a few minutes. This releases built-up moisture and lets in fresh air. After two weeks, burp the jars less often.
3: Control Humidity
Use humidity packs like Boveda or Integra Boost to keep levels between 58 and 62 percent. A small hygrometer in each jar helps you monitor moisture. If humidity rises above 65 percent, leave the lid off for a few hours to prevent mold.
4: Keep It Cool and Dark
Light and heat break down cannabinoids and terpenes. Store your jars in a cool, dark place with temperatures between 60 and 70°F. Do not refrigerate or freeze them; that can introduce moisture and damage trichomes.
5: Be Patient
Curing takes at least four weeks, but the longer you wait, the better the results. Cure for two to three months for the smoothest smoke and richest flavor.
A well-cured cannabis batch offers superior taste, smoother smoke, and longer-lasting freshness. Following these steps ensures optimal quality and makes the effort well worth it.
Step 6. Cannabis Storage and Maintenance
Even after curing, cannabis needs proper storage to maintain quality and longevity. Following these guidelines, you can keep your cannabis fresh and potent for as long as possible:
1. Control Temperature and Humidity
Too much moisture increases the risk of mold. If your cannabis dries out too much, it loses potency and flavor. Keep your storage area between 60 and 70 degrees Fahrenheit with humidity levels between 55 and 62 percent. A small hygrometer can help you monitor conditions.
2. Choose the Right Containers
Avoid plastic bags because they create static, which can damage delicate trichomes. Instead, store cannabis in airtight glass jars. If your jars are clear, keep them in a cabinet or box to block out light. Tinted or UV-resistant glass provides extra protection.
3. Minimize Air Exposure
Oxygen degrades cannabinoids and terpenes over time. To keep your cannabis fresh, use containers that fit your batch size to limit extra air space. Open the jar only when necessary to reduce exposure.
4. Keep Away from Light
Exposure to light breaks down THC, reducing potency and altering effects. Store cannabis in a dark place or use UV-blocking glass jars to protect it.
5. Avoid Strong Odors
Cannabis absorbs surrounding smells, which can change its natural terpene profile. Keep it away from strong-smelling items like coffee, spices, and cleaning products.
6. Clean Your Storage Containers
If you reuse jars or containers, wash and dry them thoroughly between batches. Residue from old products can affect the freshness, aroma, and flavor of new cannabis.
Legal Considerations for Cannabis Storage
For businesses and individuals, proper cannabis storage isn’t just about maintaining quality, it’s also about compliance with local laws. Regulations vary by region, so always check your local and federal guidelines. Here are some key considerations:
- Licensed Businesses: Dispensaries and cultivators must follow strict storage protocols, including secure, locked storage areas to prevent unauthorized access.
- Home Storage: In some regions, cannabis must be stored in childproof, tamper-resistant containers and kept away from minors.
- Possession Limits: Be aware of legal possession and storage limits, as exceeding them can lead to penalties.
- Transportation Laws: If transporting cannabis, it must often be stored in a sealed container and kept out of reach while driving.
- Compliance with Testing Requirements: Businesses may need to store cannabis in conditions that preserve potency for regulatory lab testing.
Note: Always refer to local government websites or regulatory bodies to ensure you're following the latest legal requirements.
Conclusion
Harvesting, drying, and curing properly ensures your cannabis is smooth, flavorful, and potent. Taking the time to do it right pays off in quality and enjoyment. However, managing a cannabis cultivation process efficiently can be challenging without the right tools.
This is where PlanaCan helps you maximize yields and streamline operations. With PlanaCan, you can simplify task management by defining and automating your cultivation processes using customizable templates. Every step, from planting to harvest, can be structured for specific strains or harvest cycles. Once you create your templates, scheduling tasks onto a calendar takes just a few clicks, keeping your workflow smooth and consistent.
PlanaCan also provides a clear visual timeline for all cultivation tasks. You can plan months in advance while monitoring daily activities. It allows real-time adjustments and centralizes key information so nothing is overlooked. This means more efficiency, fewer mistakes, and better yields.
With PlanaCan, you have the tools to optimize your processes and achieve the best possible results.
Schedule a free call today to see how PlanaCan can enhance your cannabis cultivation journey.