Are you losing valuable yields because your cannabis drying process isn’t meeting expectations? Months of careful cultivation ensure your plants get just the right balance of nutrients, light, and care, but if conditions aren’t optimized, everything begins to unravel in a few short days in the drying room.
Did you know that adequately dried cannabis can result in up to 25% growth in the global cannabis market? However, uncontrolled humidity, poor ventilation, and lack of consistency can make the quality poor. These challenges are frustrating and costly, especially as you scale your operation. The drying process is the critical bridge between harvest and curing, and proper attention is necessary to avoid becoming a bottleneck in your cultivation workflow.
Here’s the good news: you can control this process and ensure every batch reaches its full potential by understanding and implementing the correct drying techniques. This guide will cover everything you need to know, from managing temperature and humidity to designing an efficient drying space.
Why Is Proper Cannabis Drying Important?
Proper cannabis drying is crucial for preserving the quality, potency, and flavor of your product. When done improperly, it can result in the loss of precious cannabinoids and valuable terpenes to an extent that creates a harsher, less flavorful product. In addition, poor drying expands the potential for mold and mildew, as well as other contaminants that can ruin your harvest.
Optimally ensuring drying conditions maintains the integrity of your cannabis, making its aroma richer and its taste balanced while making it more interesting on the market.
Now that we understand the importance of drying cannabis properly, let’s explore some of the standard drying methods.
Common Types of Cannabis Drying Methods
Once you understand the importance of a drying room, selecting the drying method that best suits your needs and resources is crucial. Each method has unique advantages and may vary depending on your operation’s size, goals, and budget. Let’s explore different approaches.
Hang Drying
Hang drying is one of the oldest techniques. In this technique, whole plants or branches are hung upside down. The primary advantage in terms of preserving terpenes and cannabinoids is the air circulation around the plants. This method definitely needs to be more space-friendly and fast. It is recommended for growers who prefer quality over speed
Pros:
- Better preservation of terpenes and cannabinoids compared with other methods.
- Even drying is ensured with proper airflow.
- Simple, low-cost setup.
- Quality-focused growers should opt for this.
Cons:
- It requires a lot of space.
- The slower drying method usually takes 7-14 days.
- It can be less efficient for large-scale applications.
- It may require some careful monitoring to avoid mold and uneven drying.
Rack Drying
Rack drying is compact and efficient for growers with limited space. In this method, each bud is laid flat on a mesh rack so air can penetrate the buds from all sides. However, rack drying leaves a margin for over-drying or developing spots on the buds if not monitored closely.
Pros:
- Perfect for small grow operations or space-constrained areas.
- Air can reach all parts of the buds, thus evenly drying them.
- Rack drying tends to be faster than hanging drying.
Cons:
- Constant monitoring is necessary to avoid over-drying the buds.
- The buds may have hot spots or uneven drying if not rotated and monitored.
- It will not support high-volume harvesting unless you have many racks.
Innovative Alternatives
Advanced techniques include freeze-drying and machine drying, which cut down on time but still preserve quality. Freezing is particularly excellent for terpenes, but is expensive. Machine drying is another option: it is fast but might compromise the flavor and aroma at the end.
Freeze-Drying:
Freeze-drying is an advanced drying method that involves freezing marijuana and then removing moisture through the application of a vacuum. It is also known as lyophilization. It is one of the best drying methods for retaining the high quality of marijuana, primarily its cannabinoids and terpenes.
Pros:
- Terpenes and cannabinoids are preserved very well
- Retains excellent flavor and aroma
- The drying process is faster compared to other traditional methods
- The risk of mold or mildew is minimal
Cons:
- Expensive equipment and operational costs
- Requires technical knowledge and training
- Limited scalability in large operations
Machine Drying:
Machine drying is a modern industrial method that uses specialized machines to speed up the entire process. It doesn’t resemble older methods, such as hang drying and rack drying; instead, it uses drying machines that regulate factors such as temperature, airflow, and humidity to speed up the quick drying of cannabis products.
Pros:
- Drying is faster and saves time
- Ideal for large-scale operations
- Less expensive than freeze-drying
Cons:
- May compromise flavor and aroma
- Risk of uneven drying if not closely monitored
- Higher risk of degradation in cannabinoids and terpenes
Now that you have the techniques let’s understand the room requirements to dry your cannabis.
Understanding Drying Room Requirements
Most growers face challenges in trying to get the temperature and humidity just right in their drying room. You’re not alone in this struggle. The drying stage is critical in preserving the quality of your cannabis crop, and it’s tricky to balance all these requirements. Here’s a breakdown of the critical requirements that will help you understand what’s needed and avoid common mistakes.
Room setup
- Size: The drying room should be large enough to accommodate all the harvested cannabis while allowing for proper airflow between the plants. Space should be adjusted based on the volume of your harvest.
- Location: Choose a space that is free from direct sunlight, high traffic, and fluctuating temperatures. An indoor, enclosed room with solid walls is ideal. Avoid areas with high humidity (like basements) unless you can control it effectively.
Temperature and Humidity
- Best Temperature Range for Drying Cannabis: Store them at a temperature of between 60-70°F so as to dry out slowly and evenly.
- Ideal Humidity Range: Maintain a relative humidity of 45-60% to prevent the cannabis from drying too quickly or trapping moisture inside.
- Avoid Overheating: Cannabis dries too quickly at temperatures above 70°F, causing a loss of terpenes and creating an unpleasant, brittle texture.
- Keep Excess Moisture at Bay: High humidity retains moisture within the plant, leading to mold and mildew.
- Monitor Constantly: Use hygrometers and thermometers to track temperature and humidity levels throughout the drying process.
- Automated Climate Control: For large operations, invest in automated systems to keep conditions absolutely precise and avoid fluctuations that may compromise quality.
While temperature and humidity are critical, they do not act in isolation. Ventilation plays a key supporting role, ensuring the environment stays constant and accessible from stagnant air. Let’s examine how airflow affects your drying room.
Ventilation
- Ensure Good Airflow: Proper airflow is crucial to maintaining the right drying environment. It helps prevent moisture buildup, uneven drying, and mold formation.
- Avoid Too Much Airflow: Too much airflow can dry out the outer layers of the buds, leaving the inside wet—a condition known as “case hardening.” Balance is key.
- Use Oscillating Fans: Install oscillating fans to create smooth, uniform air circulation across the plants. This ensures air moves gently without directly blowing on the buds.
- Position Fans Carefully: To prevent terpene loss and uneven drying, avoid direct airflow on your cannabis. Instead, position fans to encourage indirect air movement for optimal drying conditions.
- Install Exhaust Systems (for larger setups): Exhaust systems remove moist, damp air from the room and bring in fresh, dry air. This helps stabilize the drying environment for uniform results.
- Control Temperature and Humidity: Integrate temperature and humidity control systems alongside your airflow setup to create the ideal environment for drying cannabis. Consistent conditions are essential for preserving quality.
Now that you know these factors affect your environment, it’s time to consider the physical setting of the drying room. The design and layout of your area will determine the efficiency and consistency of the process. So, what essential equipment do you need in your drying room?
Essential Equipment
The ideal drying room requires a combination of equipment to maintain constant conditions. With the proper tools, managing critical factors such as humidity, temperature, and airflow becomes easier, particularly at larger scales. With the right equipment, a drying room will run efficiently, prevent environmental damage to crops, and hence improve the quality of cannabis. Here are some of them:
1. Dehumidifiers
Dehumidifiers are essential for controlling humidity levels in your drying room. They help remove excess moisture that could create the conditions for mold and mildew growth. Steady humidity control is essential to ensure that your cannabis dries properly and doesn’t lose its terpenes. Whether the climate is naturally humid or seasonal fluctuations occur, a good dehumidifier is an indispensable tool for finding the ideal humidity range between 45% and 60%.
2. Oscillating Fans
Air circulation plays a vital role in the drying process, and oscillating fans provide the gentle, consistent airflow needed to avoid hotspots and stagnant air. Proper air movement prevents mold from forming while ensuring moisture evaporates evenly across all plants. Unlike stationary fans, oscillating fans distribute air more evenly and can be positioned to move airflow around the plants without directly hitting them, protecting delicate terpenes from being stripped away.
3. Hygrometers and Thermometers
Hygrometers and thermometers must be used to maintain proper temperature and humidity levels. These devices provide real-time data on the conditions in your drying room, helping you make timely adjustments when necessary. In higher production facilities, digital hygrometers and thermometers can be used, which will automatically alert you if the levels shift outside of a productive range.
4. Climate Control Systems
Climate control systems automatically control adjustments for a consistent environment. They are highly beneficial in high-end operations or when a facility requires more drying rooms than one can reasonably hand-check for temperature and humidity changes. For extensive facilities, climate control automation is beneficial where human intervention is impractical due to the scale of operations. With climate control technology investment, the risk of fluctuations that can damage your crop is significantly minimized.
5. Invest in a Cultivation Software
While physical equipment is essential, efficient management of your drying room environment often goes beyond hardware. That is where cultivation software comes in. Cultivation software lets you automate and monitor critical aspects of your drying room to ensure consistency and minimize the chance of human error. From tracking real-time temperature and humidity levels to scheduling automatic adjustments for optimal airflow, this software streamlines your operations.
With PlanaCan, you can automate critical aspects of your drying room, such as temperature control, humidity regulation, and airflow management. The platform also tracks environmental data over time, giving you a comprehensive overview of your drying process and helping you make informed decisions. Additionally, PlanaCan’s intuitive interface makes it easy to set schedules, monitor conditions, and collaborate with your team. This software ensures that the drying room runs efficiently and smoothly, improving your overall yield and cannabis quality.
Now that you have the techniques and room requirements, let’s understand how to dry them.
How to Dry Cannabis to Perfection?

Dried cannabis achieves its full potential and can be used properly. Following a precise drying procedure ensures that your crop maintains its potency, flavor, and overall quality. Here are the steps to ensure that your cannabis is dried to perfection.
Step 1: Harvesting the Cannabis
- Carefully cut the plant or branches: Harvesting should be done with precision to avoid damaging the buds. Use sharp tools and cut the plant or branches from the main stem.
- Timing is crucial: The best time to harvest is when the trichomes (tiny resin glands on the buds) are primarily milky white, with some amber ones mixed in. This indicates the optimal potency and flavor of the cannabis.
- Avoid harvesting too early or late: If harvested too early, the buds may lack potency. If harvested too late, the quality and the smell may degrade, and the cannabis may be harsher to smoke.
Step 2: Trimming the Leaves
- Eliminate excess leaves: This helps cut down on the water content and increases air movement at the drying room area where marijuana is placed.
- Choose when to trim: Some growers trim before drying, while others prefer trimming after. Trimming before can make the drying process more uniform.
- Be gentle: When trimming before drying, be gentle with the buds to avoid damaging them.
- Avoid over-trimming: Do not remove too much plant matter, as this can interfere with the drying process and may also affect the quality of the final product.
Step 3: Hang or Lay the Buds
Hang Drying:
- Prepare the Branches: Trim your cannabis plants at the base and remove any oversized fan leaves. Tie the branches upside down with twine, hooks, or hangers to prevent them from falling.
- Space the Buds: Place the buds along the branches, leaving enough spacing for air to pass freely through each bud.
- Find a Well-Ventilated Location: To prevent mold and ensure uniform drying, hang branches in a well-circulating place, such as a drying room with blowing fans.
- Watch Humidity and Temperature: Hold the drying area to between 60-70°F or 15-21°C with humidity levels running around 45-60% in order to keep the overdrying or any chances of mold.
Rack Drying:
- Prepare Mesh Racks: Install clean mesh racks in your drying room. The racks should be sturdy and strong enough to hold the buds laid flat without overlapping each other.
- Spread Buds Flat: Spread each bud flat on the mesh racks. Avoid stacking and overcrowding them, as this will promote air circulation to every bud.
- Ensure Good Air Circulation: Place the racks in a room with consistent air circulation. This will dry the buds evenly and prevent mold or mildew.
- Check Temperature and Humidity: The temperature of the drying room should be between 60-70°F, and the humidity should be between 45-60%. These conditions will help preserve cannabinoids and terpenes without allowing moisture to build up.
- Rotate Buds Periodically: If possible, rotate buds on the racks. This ensures uniform drying while preventing uneven moisture levels between buds.
Step 4: Monitor the Environment
- Monitor Temperature: Keep the temperature in the range of 60-70°F. Use a trusted thermometer to monitor and keep constant temperatures since variation may compromise your cannabis quality.
- Check Humidity Levels: The best drying conditions are relative humidity levels of 45-60%. Monitor your humidity levels with a hygrometer regularly, keeping them in that range. If the humidity levels in the room exceed the specified value, dehumidifiers should be introduced to reduce the percentage. If the level drops below the ideal one, change the settings of the dehumidifier. Ensure constant humidity to retain terpenes and cannabinoids.
- Balance the Air Flow: Avoid the occurrence of stagnant air and chances of developing mold environment and uneven drying. Use oscillating fans for a gentle, uniform flow of air around your plants to prevent moisture buildup and promote even drying.
Step 5: Dryness Check
- Drying time: Depending on the size and density of your buds, this process could take 7 to 14 days.
- Ventilation: Ensure your drying room is well-ventilated for optimal airflow.
- Check the Stem: Gently snap off a small stem to test its dryness.
- Dry Stem Test: If the stem breaks easily and the buds feel a little dry on the outside, the drying process is almost complete.
- Wet Buds: If it bends or the buds are sticky, wait for some extra time to pass by again.
Step 6: Curing Buds
- Place Buds in Airtight Containers: Store your cannabis buds in glass jars or other airtight containers.
- Open Containers Daily: To enable fresh air exchange, leave the jars open for 10-15 minutes each day.
- Cure for 2-4 Weeks: Let the buds cure for 2-4 weeks, then check for any visible signs of mold or excess moisture buildup.
- Flavor and Smoother: The curing process enhances the taste, aroma, and smoothness of cannabis smoke.
Are you facing difficulty in keeping track of your cannabis drying schedule? Don’t worry. Using PlanaCan‘s interactive calendar makes it easy to coordinate and monitor your cannabis drying day schedule with all the essential tasks you have set. You can create a schedule for your drying days while planning ahead for curing and monitoring the progress of your harvest in one package.
Now that we understand the steps to dry cannabis, it is equally essential to understand balancing temperature, humidity, and airflow that can differ depending on the size of your operation and the strains grown. Let’s start by exploring the critical requirements for a successful drying room.
Now that every factor is in place, you can start learning how to design the optimal drying room for cannabis.
Designing the Perfect Drying Room for Cannabis
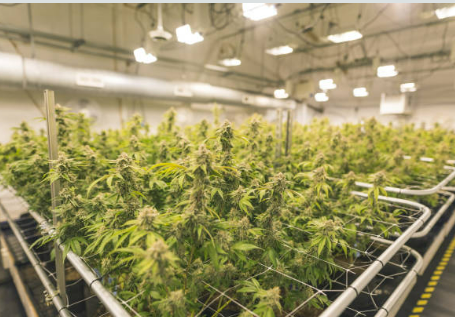
The size and layout of your drying room will depend on the scale and goals of your operation. For smaller growers, a simple hang drying room setup is required. More extensive facilities, however, require intelligent planning to optimize airflow, maximize available space, and maintain consistent conditions.
An efficient drying room layout ensures proper air circulation around every plant. Overcrowding is a common mistake that can lead to uneven drying and mold formation. When hanging plants, leave sufficient space between rows to allow air to flow freely. If you’re using racks, position them to ensure even exposure to airflow and rotate them periodically for uniform drying.
The other consideration is lighting. Since light degrades cannabinoids and terpenes, your drying room should be kept as dark as possible. Use low-intensity lighting only when it is necessary to check the plants or adjust the equipment.
Once you’ve developed an efficient drying room layout, the next step is to care for the ideal conditions in that space.
Conclusion
Perfecting the drying room is paramount to producing better-quality cannabis. The temperature, humidity, and airflow of your drying room directly determine the pot, flavor, and aroma of your final product. Whether you have a small hang-drying setup or a large facility, the key is to keep this consistent.
With PlanaCan, you can simplify drying room management through purpose-built software that streamlines cannabis cultivation. Features such as automated workflows, interactive calendars, and collaboration tools ensure that your drying room needs are met precisely. For example, if terpene retention is irregular at any point during the drying process, PlanaCan’s data harvest reports allow you to identify issues and adjust as needed in real-time.
Don’t let drying complications prevent your cultivation success. Schedule a free call today with PlanaCan to learn how our software can streamline your cannabis drying and ensure consistent, quality results every harvest.
FAQs
- How long does cannabis typically take to dry?
Cannabis typically takes 7 to 14 days to dry, depending on temperature, humidity, airflow, and bud density. With optimal conditions (60-70°F, 45-60% humidity), drying gradually preserves potency and flavor. Too high a temperature can cause brittleness and terpene loss, while excess humidity risks mold and extended drying times.
- What’s the ideal duration for curing cannabis?
Curing cannabis improves flavor, potency, and quality. The process usually takes 2-8 weeks; some cure it for up to 3 months. Once dry, store buds in tightly sealed containers in a cool, dark environment. Burp the containers in the first week to prevent mold growth, and store them with humidity levels at 55-62% for full maturation.


