Have you ever wondered how long it takes for weed to grow from seed to harvest? The process can feel overwhelming, especially considering the different stages and factors that can influence the timeline. Many details have to be considered, from choosing the right seeds to making sure the environment is perfect. You may wonder how to optimize growth, ensure healthy plants, or avoid common mistakes that delay results.
Growing cannabis is not a simple process of planting seeds and then waiting for the harvest; it involves knowledge, effort, and patience. The growing stages and their timelines are essential when growing cannabis indoors or outdoors.
This guide details each step, helping you plan well and achieve a successful harvest regardless of your experience level. Let us dive right in and understand each cannabis growth stage in detail.
Understanding Different Stages for Cannabis Growth
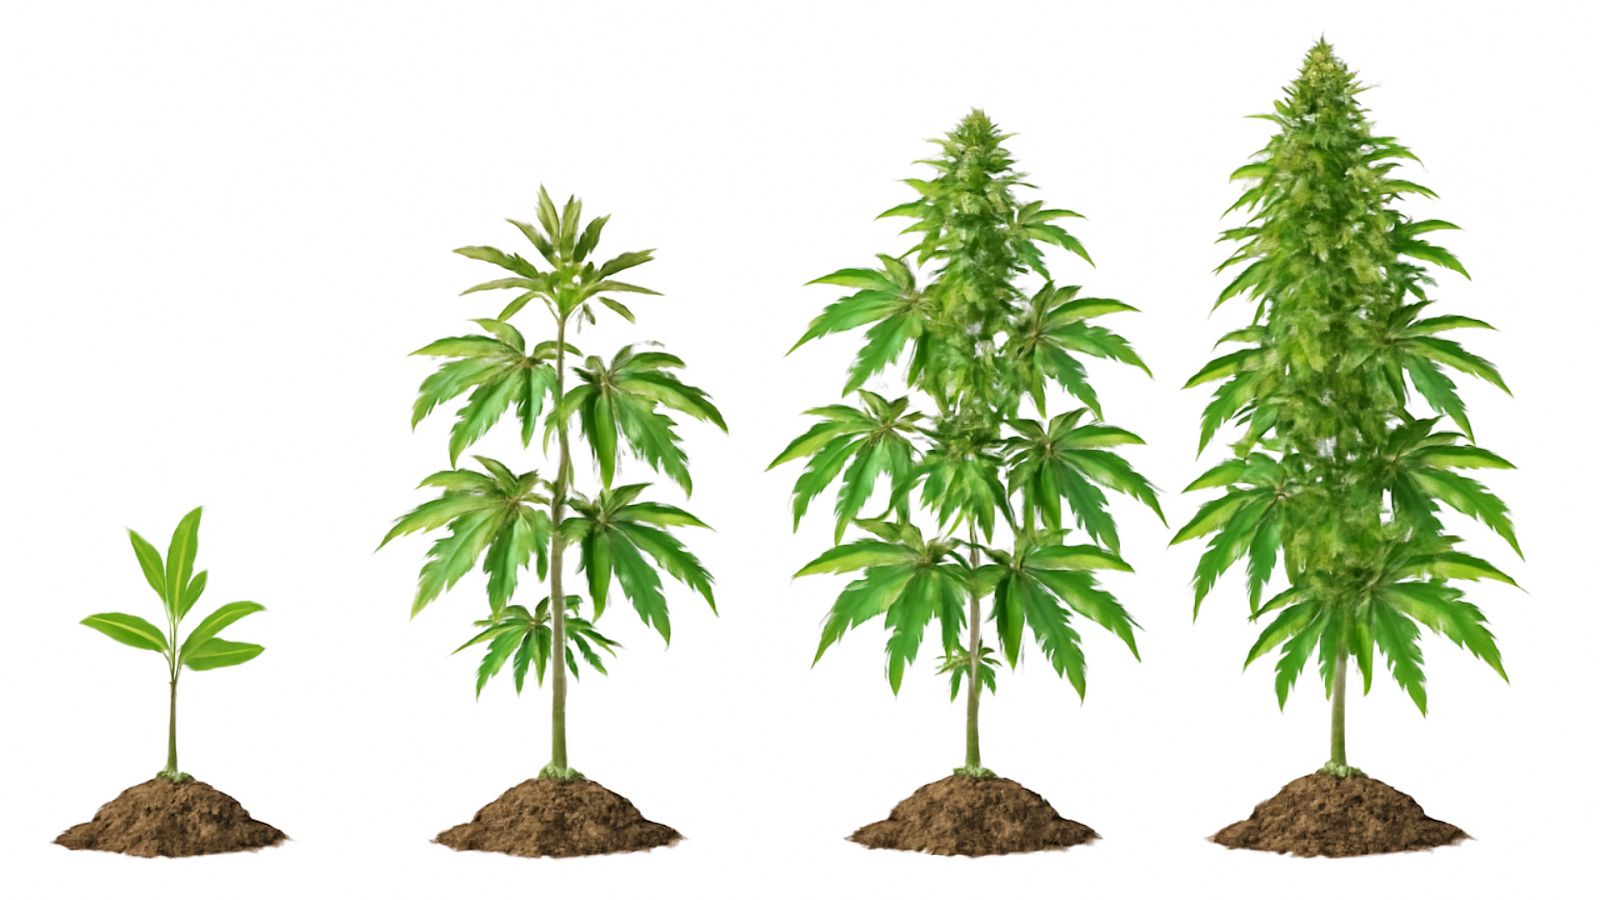
Cannabis growth is based on a timeline, with all stages being crucial to developing healthily. Here are the stages in brief:
- Germination (1-7 days): Sprouting of the seed forms roots and shoots.
- Seedling (2-3 weeks): The plant begins putting out its first set of true leaves.
- Vegetative (2-8 weeks): The plant produces rapid growth, with the growth of branches and leaves.
- Pre-flowering (1-2 weeks): Signs of sex begin to show when the plant is preparing for flowering.
- Flowering (6-8 weeks): Flowers begin to form, and the plant puts all its effort into flowering.
- Harvesting: The plant will be ready for harvest when the buds are fully ripe.
Cannabis Growth Stages Week by Week
There are several weeks of cannabis growth stages, each a vital phase in the development of the plant. From germination, the seed will sprout and begin developing roots within the first week. Let us understand the cannabis growth stages in detail:
1. Cannabis Germination Phase
The germination stage is the first step to cultivate cannabis, which ranges between 1 to 7 days. At this phase, the seed breaks out of its outer casing, and a small root called a taproot starts to appear, from which your plant's life cycle begins. This stage is short, but it is crucial to set the tone for overall plant health and productivity.
Key factors for germination success:
- Seed quality: High-quality seeds greatly influence growth potential. Buy from reputable seed sources with good reviews, and consider factors like genetic stability and freshness. Fresh seeds with strong genetics have a greater chance of germinating quickly and becoming healthy plants.
- Conditions: For germination to occur, keep the temperature at a constant 70-85°F and the environment dark and moist. Avoid extremes, as too much heat or cold can kill the seed. A humidity of around 70% can also create the perfect environment for the seed to sprout.
- Methods: The most common methods are the paper towel method, direct planting in soil, and germination stimulators such as root enhancers. The paper towel method involves placing seeds between moist paper towels in a sealed container to keep them moist. At the same time, soil planting allows seeds to acclimate directly to their growing medium.
- Moisture balance: In addition to keeping the medium slightly damp, consider using a spray bottle to control moisture levels precisely. This ensures the seed remains hydrated without oversaturating the medium. Adding a humidity dome can also help maintain consistent moisture.
- Available Oxygen: Seeds require oxygen availability during germination. Never compact the soil or medium too tight so that free air exchange is possible. Aerated soils or lighter potting mixes are a good choice.
- pH: For maximum nutrient availability and healthy germination, the growing medium will likely need to be kept on the acidic to neutral end of the pH, around 6.0 to 7.0, since a pH meter is able to get specific.
- Sanitation: Maintain clean tools and sterile environments to minimize the risk of contamination that may harm the seedling. Disinfect containers and wash hands before handling seeds. Pre-soaking seeds in a mild hydrogen peroxide solution also reduces the risk of pathogens.
- Seed pre-soaking: Some growers like to soak seeds in warm water for 12 to 24 hours before planting to soften the outer shell and encourage faster germination.Keep the growing medium slightly damp but not soggy. Overwatering can suffocate the seed, while dryness will halt germination. Once the root appears—usually within a few days—transfer the seed to its growing media, such as soil, coco coir, or hydroponic setups. Position the seed with the root tip facing downward, as this will allow the taproot to anchor correctly.
Ensuring optimal conditions during the germination phase takes time. This helps your plant get a strong start and makes it more resilient in later stages. Attention to detail at this stage can dramatically improve the chances of a successful harvest.
2. Cannabis Seedling Stage
The seedling stage lasts 2–3 weeks, during which the plant's first true leaves grow for photosynthesis. Long-term problems arise when pests such as fungus gnats and nutrient deficiencies strike. Early problem-solving will ensure that these do not lead to more significant issues. Let us look at its environmental requirements.
Environmental needs:
- Lighting: To promote strong development, provide 18-24 hours of light per day. LED lights are energy-efficient and have the right spectrum for young plants without producing too much heat.
Focus on the blue spectrum in the range of 400-500 nm, which promotes vegetative growth and strong stems. Position the light source correctly to avoid stretching or burning, usually 12-18 inches above the seedlings, depending on the intensity of the light.
- Humidity: Maintain a relative humidity of 65-70%. Low humidity will stress the seedlings, and too much moisture can encourage the growth of mold and other fungi. Use a hygrometer to measure humidity accurately.
- Temperature: Keep it between 70-80°F. Sudden temperature changes can stress the seedlings and slow their growth. A steady environment encourages steady development.
- Nutrition: Avoid overfeeding. Young plants should receive a weak nutrient solution. Seedlings require minimal feeding as they depend mainly on the energy in their seeds. Use fertilizers made for seedlings to avoid nutrient burn.
- Airflow: Ensure proper airflow around the seedlings. This will prevent heat and humidity buildup, which might lead to mold or pest problems. A small fan can help circulate air gently without stressing the plants.
- Watering: Water the seedlings sparingly but consistently, ensuring the medium stays moist but not waterlogged. Overwatering can lead to root rot, while underwatering may cause the plant to wilt. To test soil moisture, insert your finger about an inch into the medium—if it feels dry, it’s time to water. Alternatively, you can use a moisture meter for more precise readings.
The best time to water is early, as the excess moisture evaporation occurs under the light so that mold or fungal growth is minimized. Water them gently by using a fine nozzle watering can or with a spray bottle to ensure that it does not wash away the delicate roots from the plants.
3. Cannabis Vegetative Stage
The vegetative stage can last 3 to 16 weeks, depending on the strain and whether you’re growing indoors or outdoors. During this time, the cannabis plant focuses on growing leaves, stems, and roots, building the framework necessary to support healthy buds during flowering.
Growth requirements:
- Light: Provide at least 12 hours of light per day; more light promotes faster growth. Indoor growers often use a light cycle of 18-24 hours to maximize vegetative development. Position lights close enough to provide vigorous intensity but far enough to prevent heat stress or burning.
- Nutrients: Raise nitrogen to enhance healthy growth. A balanced N-P-K ratio, high in nitrogen, will make it very leafy and healthy. Add micronutrients like calcium and magnesium for growth.
- Watering: To prevent overwatering, follow a consistent schedule and ensure proper drainage. The frequency of watering depends on your growing medium, but the general idea is to keep it moist, not soggy. Techniques like bottom watering help distribute moisture evenly.
- Space: Give your plant enough room to grow. This growth stage can result in dramatic increases in plant size, so space the plants well apart to avoid overcrowding. Use topping, FIMing, or LST to manage height and shape while encouraging multiple colas.
- Airflow and CO2: Proper airflow is essential for keeping the stem strong and mold-free. A gentle fan creates the wind, helping the plant grow more vigorously. To accelerate the pace of photosynthesis, grow indoors with a bit of CO2 enrichment.
- Temperature and Humidity: Keep at 70-85°F and humidity at 40-70%. Gradually reduce humidity as it matures so that it does not develop into a case of mildew.
Adjusting the light cycle can help indoor growers control the length of the vegetative period. Outdoor plants depend on natural light, which may extend this stage into several months, particularly in regions with long summer days.
4. Cannabis Pre-flowering Stage
The pre-flowering stage lasts 1 to 2 weeks. This is a critical transitional period in which plants will start to show signs of their sex, an essential step to separate male from female plants. Proper management during this stage can significantly impact the quality and yield of your harvest.
What to look for:
- Male plants: Produce pollen sacs that look like small balls. These sacs typically form at the nodes and grow in clusters. Left unchecked, male plants will release pollen, which may cause seed production in the female plants and decrease the quality of the buds.
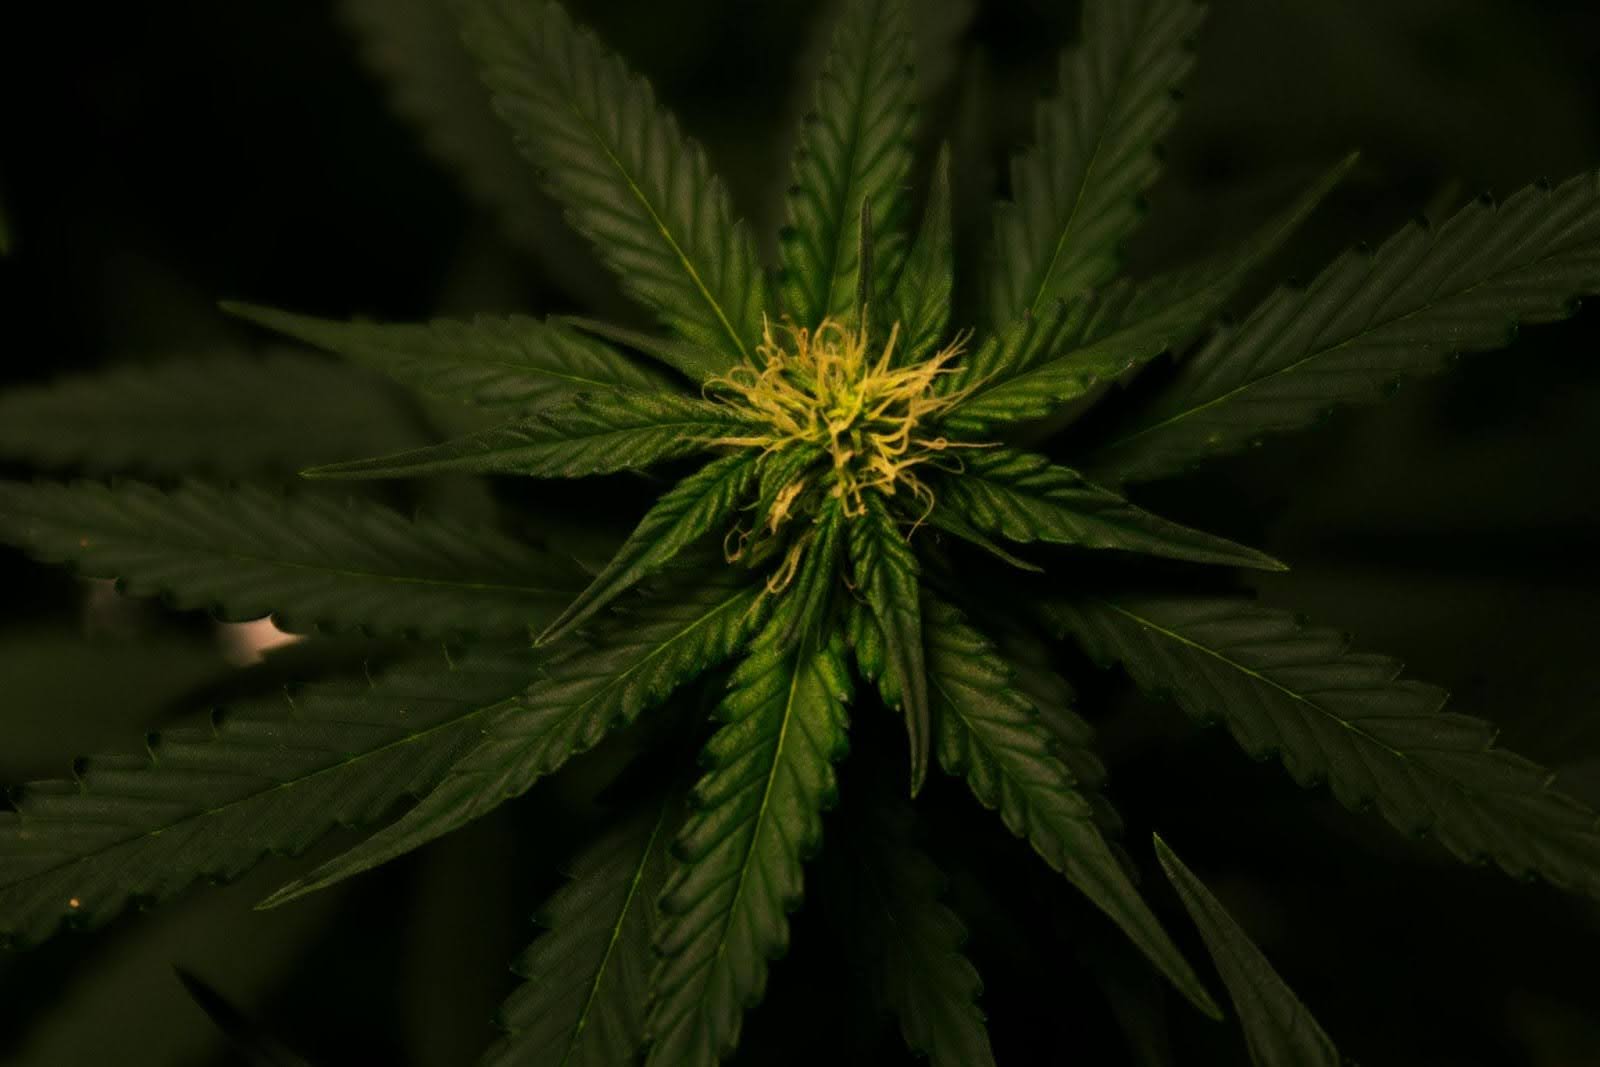
- Female plants: Pistils at the nodes form in small, hair-like forms. These white hairs are early signs of flowers that develop into buds. Key steps during pre-flowering:
- Early detection: Observe plants daily and remove male plants as soon as possible. This prevents accidental pollination and ensures female plants focus their energy on bud development. Separating plants promptly also avoids the risk of hermaphroditism, which can further complicate growth. Are you looking to maximize your cannabis yield while avoiding common pitfalls? PlanaCan allows you to track all of your cultivation processes in real-time, so every decision counts. Observe your plants daily, remove the male plants to avoid accidental pollination, and ensure that female plants focus their energy on bud development.
- Environmental adaptations: Conditions are stable during this stage. Temperatures are kept at 70-85°F, and humidity is maintained at 40-60%. Extreme conditions, such as inconsistent watering, light leaks, or nutrient deficiencies, stress the plant, which may become hermaphroditic and develop male and female traits.
- Nutrient optimization: Use a transition nutrient mix to prepare the flowers for flowering. The percentage of nitrogen should decrease minimally, while the addition of phosphorus and potassium will enhance bud development. The ratio should be 5-10-7 or similar, depending on the specific variety's needs.
- Support structures: Rapid growth spurts during this stage may require staking or trellising to provide adequate support for branches. Bamboo stakes, plant ties, or netting can help keep plants upright and ready to bear the weight of future buds.
- Consistent light cycle: In indoor growing, it's crucial to maintain consistency in the light cycle, whether 18/6 or 24/0. Changing light schedules may stress the plants, prolong flowering readiness, and reduce yields. Identifying and removing male plants is crucial for preventing pollination. Pollinated females will produce seeds instead of focusing their energy on bud production.
- During this stage, you may also notice rapid growth spurts as the plant transitions to flowering. By taking proactive steps and closely monitoring your plants, you can ensure they are well-prepared for optimal flowering and high yields.

5. Cannabis Flowering Stage
The flowering stage is the most exciting part of growing cannabis and lasts 6 to 11 weeks. This phase is triggered by changes in the light cycle—usually 12 hours of light and 12 hours of darkness for indoor growers. During this time, your plant shifts its energy from vegetative growth to bud production, making it one of the most critical stages in the entire growth cycle.
What happens during the flowering stage :
- Bud development: Flowers grow and thicken, becoming denser over time. They develop a sticky resin coating that contains cannabinoids and terpenes, which are essential for potency and aroma. Ensuring proper airflow around the buds helps prevent mold and mildew.
- Trichome formation: These crystal-like structures indicate potency and readiness. Initially clear, trichomes turn cloudy or amber as the plant nears maturity. Use a magnifying glass or jeweller's loupe to monitor their color changes for optimal harvest timing.
- Indoor: The growers control light cycles for accurate precision, but outdoor-growing plants follow nature's changes in the seasons. According to the strain and the local climate, outdoor-growing plants flower around late summer through early fall.
- Nutrient requirements: Shift into a flowering formula nutrient mixture. Increase phosphorus and potassium while lowering nitrogen levels. This stimulates the growth of large buds without encouraging unwanted vegetative growth.
- Scent management: As flowers ripen, they develop a pungent smell. To minimize this odor, indoor cultivators should use carbon filters or air purifiers.
- Tips for success during cannabis flowering:
- Maintain stable conditions: Maintain temperatures between 65-80°F and keep humidity between 40-50% to avoid molds and other problems.
- Pest and disease monitoring: Check for signs of pests such as spider mites and mold. Act quickly on problems to protect your crop.
- Avoid overfeeding: Use flowering-specific nutrients in moderation. Overfeeding can lead to nutrient burn, which burns leaves and buds.
- Support heavy branches: As buds grow, their weight can cause branches to sag or break. Use stakes or trellises to support the plant structure.
- Light discipline: Ensure the dark period remains uninterrupted. Even brief light exposure during the dark cycle can stress plants and cause hermaphroditism.
- It can be challenging to support heavy branches while maintaining light discipline. PlanaCan’s interactive calendar helps you plan yields, track tasks like staking branches or managing dark cycles, and adjust schedules easily, keeping your cultivation organized and your plants thriving.
- Now that we know everything about the growth stages of cannabis, let us understand when is the right time to harvest your cannabis crop.
6. Harvesting Your Cannabis
The timing of harvest depends on the strain, environmental factors, and the grower's goals. In general, harvest occurs 3 to 7 months after planting. Indicators of readiness include the color of pistils, which should turn from white to a reddish-brown hue, and the appearance of trichomes, which shift from clear to cloudy or amber.
Use a magnifying glass or jeweller's loupe to inspect trichomes closely for precise timing. Amber trichomes usually indicate a more sedative effect and cloudy ones indicate a higher potency of THC.
Post-harvest processes:
- Drying: Hang your buds upside down in a dark, properly aired room with a temperature of 60-70°F and humidity levels of 50-60%. Drying usually takes 7-14 days and reduces the moist content, preventing mold. Use fans to ensure air circulation, but do not point them directly at your buds.
- Trimming: After drying, trim excess leaves and stems to enhance the buds' appearance and improve smoke quality. Depending on preference, trimming can be done before or after drying.
- Curing: For better flavor and potency, keep the dried buds in airtight containers, such as mason jars. For the first week, open the containers every day (this is known as "burping") to release excess moisture and allow fresh air in.
Then, burping occurs less often during the subsequent curing period. Proper curing is usually completed within 2 to 4 weeks, but longer curing can last up to 6 months to further enhance quality.
Additional considerations:
- Storage: Store cured cannabis in a cool, dark place to preserve its potency and flavor. Avoid light, heat, or humidity exposure, which can degrade cannabinoids and terpenes.
- Timing: To achieve the desired potency and effect, try different harvest times. Some growers harvest their crops in stages to determine differences in maturity.
Proper harvesting and post-harvest care are essential for ensuring high-quality cannabis. Rushing these steps can result in lower potency, diminished flavor, and a harsher smoking experience.
Next up, let us help you understand which method - indoor or outdoor- might be suitable for the proper growth of your cannabis.
Indoor vs. Outdoor Cannabis Growing Considerations
Indoor vs. outdoor growing decides the growing speed of your weed, the level of control possible, and the potential yield for you. There are always positive and negative points when choosing between the two. Select the proper method to achieve the desired outcome for you.
Indoor growing:
- Control over environment: It allows you to control light, temperature, and humidity indoors, ensuring perfect conditions for growth no matter the weather outside.
- Shortened cycle of growth: By providing a consistent light cycle and favorable conditions, you can speed up a plant's development and harvest several crops a year.
- Equipment needed: Indoor cultivation requires an initial investment in grow lights, ventilation, dehumidifiers, and reflective materials to amplify the efficiency of light.
- Pest prevention: Indoor environments are more straightforward to protect from pests and contaminants, reducing the risk of infestations.
- Year-round cultivation: Unlike outdoor growing, indoor setups enable continuous growing cycles, offering flexibility and consistent output.
- Energy usage: Indoor growing typically uses more energy, increasing operational costs. Energy-efficient LED lights can mitigate this expense.
- Space constraints: Indoor setups may require creative solutions like vertical growing systems to maximize yield in limited spaces.
Outdoor growing:
- Natural resources: Outdoor plants depend on the sun, which makes this method more environmentally friendly and less expensive. It also does not require artificial lighting.
- Space for larger plants: More space allows outdoor plants to grow to sizes much more prominent, and that leads to greater yields.
- Seasonal variation: Outdoor growing depends on the seasons and the cycles of natural light and weather, meaning that the harvests cannot occur as frequently.
- Environmental risks: Outdoor plants are prone to unpredictable weather, pests, and diseases, so they require extra care and preparation.
- Cost efficiency: Growing outdoors has lower initial costs, as it requires fewer specialized tools, and nature itself provides essential elements like light and air circulation.
- Soil quality: Outdoor plants will depend on the local quality of the soil. Additives or raised beds might be necessary to optimize growth when the soil is of poor quality.
- Stealth concerns: Outdoor growers face privacy issues, mainly because cannabis cultivation is noticed more in urban or suburban settings.
Are you looking to monitor your cannabis yield while addressing soil quality and privacy concerns? PlanaCan helps track every harvest, capturing key decisions to tackle challenges like poor soil or stealth issues. With all data in one place, you can refine methods, avoid mistakes, and boost yields for greater profits.
Strain selection:
- Autoflowering strains: These strains grow faster, completing their lifecycle in 8 to 10 weeks regardless of light cycles. They are ideal for growers seeking quick harvests or limited space.
- Photoperiod strains: These strains depend on light cycle changes to trigger flowering. While they take longer to grow, they often produce higher yields and allow greater control over plant size and shape.
- Climate-specific strains: Choose strains suited to your region’s climate. For example, indica-dominant strains often thrive in cooler conditions, while sativa-dominant strains prefer warmer, tropical environments.
Understanding the nuances of indoor and outdoor growing can help you select a method that aligns with your goals, resources, and level of expertise. When making your decision, consider your local climate, available space, and desired outcomes.
Combining the strengths of both methods—such as starting plants indoors and finishing them outdoors—can also provide the best of both worlds for some growers.
Tips for Successful Cannabis Growth
Whether you are a novice or an experienced grower, cultivating cannabis requires dedication, knowledge, and the ability to adapt to challenges. Success depends on thoughtful planning and consistent care throughout the plant's lifecycle. Here are some essential tips to help you achieve a thriving harvest:
- Choose the right strain: Understand the growth characteristics of your chosen strain, including its timeline and environmental needs. Research whether the strain is better suited for indoor or outdoor cultivation and its sensitivity to environmental factors.
- Monitor conditions: Regularly check temperature, humidity, and light levels to keep your plants healthy. Use tools like thermometers, hygrometers, and light meters for accuracy, and adjust conditions as needed to maintain an optimal environment.
- Prune strategically: Remove unwanted leaves to enhance air and light penetration. Focus on the lower leaves and overcrowded areas to minimize the risks of mold and pests while enhancing energy distribution to the buds.
- Optimize nutrient delivery: Ensure that plants receive the right nutrients at each stage of growth. Use pH-balanced water and fertilizers appropriate for the seedling, vegetative, and flowering phases.
- Stay alert: Monitor the signs of pests, diseases, or nutrient deficiencies and address them immediately. Early detection may prevent widespread issues and salvage your crop.
- Experiment and learn: Try different techniques, such as topping, low-stress training (LST), or varying light schedules, to see what works best for your specific setup and strain.
- Patience pays: Cultivation of cannabis takes time and care, but the reward of a successful harvest makes it worthwhile. Never rush the process, especially during the critical stages like drying and curing, in order to have the best product.
Conclusion
The growing time for weeds differs significantly and can take as little as 3 months to up to 7 months. Growth timelines vary depending on the strain, environment, and care that is involved. With careful planning and attention to detail, it is possible to harvest successfully when the plants are entirely matured. The knowledge of each growth stage ensures your plants grow healthy and meet the quality and potency expectations. Whether you are a novice or a veteran grower, taking time in preparation and learning will place you in a good position for success.
To make it even easier, PlanaCan has developed innovative tools to help cannabis growers maximize their yields and manage their crops.
PlanaCan simplifies cannabis cultivation by allowing growers to outline and automate processes using customizable templates. From planting to harvest, templates can be tailored to specific strains or cycles and scheduled on a calendar for consistency. Its visual timeline helps plan months ahead while keeping daily tasks on track. With an adjustable task system and a centralized calendar, teams stay aligned, ensuring no steps are missed.
By using PlanaCan's powerful tools, you can optimize your growing process, save time, and focus on producing the best possible cannabis.
Schedule a free call today to learn how PlanaCan can help you take your cultivation to the next level.


