Are the tips of your cannabis leaves turning brown and curling as if they’ve been crisped in an oven? You walk into your grow room expecting lush, thriving plants. Instead, you find scorched edges and clawed tips. It’s frustrating. You’ve been feeding, watering, and providing the right light. Everything they should need. So why do they still look stressed?
Most likely, you’re dealing with a nutrient burn. This happens when your plant receives more nutrients than it can handle. The excess builds up at the roots, overwhelms the system, and starts burning the tips of your leaves. If this continues, growth slows, the leaves dry out, and the buds you were hoping for turn out underdeveloped and harsh.
However, nutrient burns are common and completely manageable. With a few targeted changes, you can halt the damage, encourage a healthy recovery, and prevent the problem from growing in the future.
Let’s break down exactly what’s going on and how to fix it.
What Causes Cannabis Leaves to Burn?
Nutrient burn in cannabis plants usually starts with good intentions. You want your plants to thrive, so you feed them what you believe they need. But when you go overboard, even slightly, the roots can’t process the excess, and it starts to backfire. Here’s how it happens:
- Nutrient Overload at the Roots: Giving your plant too many nutrients at once leads to an excess that sits in the root zone. Over time, this creates a toxic environment. The roots can’t breathe properly, and the plant starts reacting. The earliest sign? Cannabis brown tips or burnt leaf tips that look like they’ve been singed. These tips are your plant's way of crying out for help.
- Imbalance in Soil Chemistry: High nutrient concentration affects the soil or growing medium's pH, locking out essential nutrients. Even though nutrients are present, your plant can't use them efficiently. This worsens symptoms and causes confusion between nutrient burn and deficiencies.
- Stress and Stunted Growth: As the toxicity builds, your plant shifts into survival mode. Growth slows down significantly, leaves become less vibrant, and new development stalls. Instead of producing lush foliage and strong buds, the plant begins to wither under excess weight.
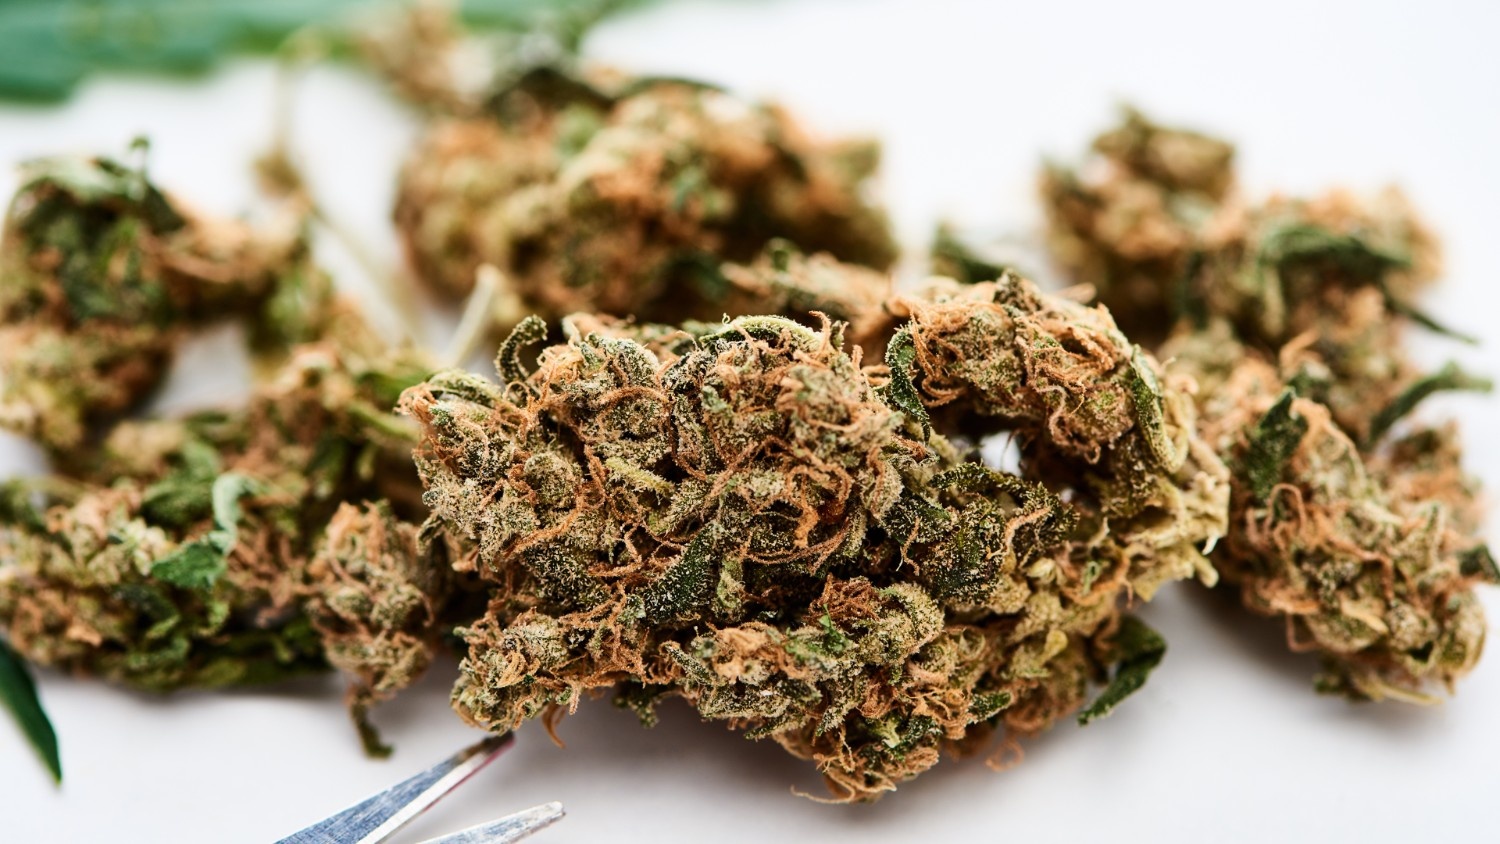
- Poor Bud Development: If the burn continues into the flowering stage, things get worse. Nutrient overload can impact the final quality of your buds. You’ll often end up with nute-burnt bud smoke, a bitter, unpleasant experience that ruins what could’ve been a great harvest.
- Weak Resistance to Pests and Disease: Overfed plants are often stressed plants. And stressed plants are more susceptible to spider mites, mold, and root rot. Nutrient burn doesn't just hurt appearance—it weakens your plant’s immune system, opening the door to even bigger issues.
This entire chain reaction is what’s known as cannabis nutrient burn. It’s incredibly common and often the result of trying too hard. But once you understand how it starts, you can avoid it completely and help your plants thrive from seed to harvest.
So, how do you spot nutrient burn in your cannabis plant? Let us understand how to do it.
Spotting the Signs Early
Catching nutrient burn early can save your grow from long-term damage and help your plants recover faster. This not only protects your harvest but also gives your cannabis plants a better chance at producing potent, high-quality buds. Many growers overlook the early signs, thinking the plant just reacts to stress or light intensity. But if you pay close attention, you’ll notice patterns that reveal what’s really going on.
Here’s what you should look out for:
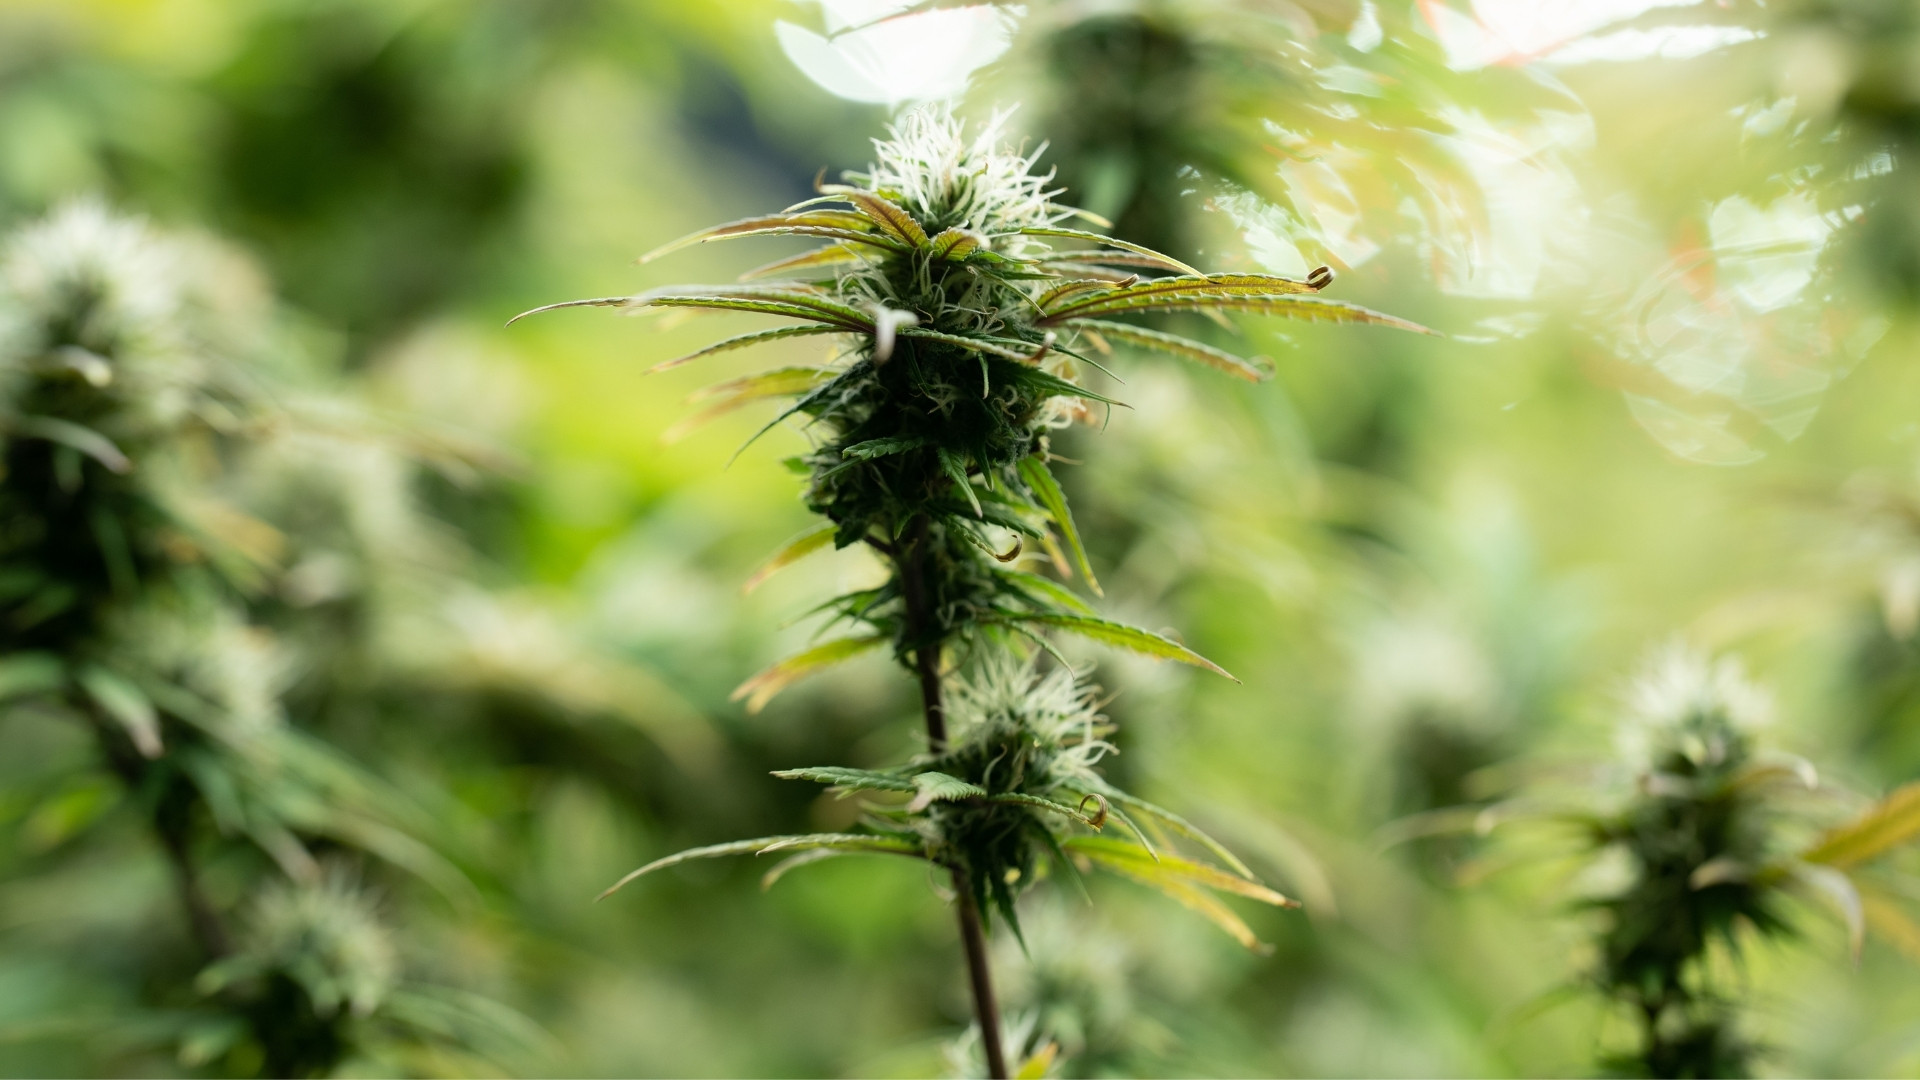
- Yellow or brown leaf tips: This is usually the first sign. It often starts at the top of the plant where light intensity is highest and nutrients build up the quickest.
- Leaf curling or clawing: Burnt tips may start curling down or clawing. This shows your plant is struggling to process what it’s receiving.
- Glossy, deep green leaves: A rich, dark green may seem healthy, but it often signals nitrogen toxicity. Leaves can look shiny or feel thicker than usual.
- Edge burn moving inward: Burn usually starts at the edges or tips and travels inward if not addressed.
- Brittle or crispy leaf tips: As the damage progresses, tips can dry out completely and break off at the touch.
- Reduced upward growth: If new leaves seem small or stop forming, the plant redirects energy to survive the toxicity.
- Interveinal discoloration: In some cases, you may notice lighter patches forming between the veins of the leaves. This indicates that the plant’s ability to take in micronutrients is compromised.
- Shiny or wet-looking leaf surfaces: Leaves that appear wet but aren’t actually moist to the touch can be another sign of stress caused by excess salts in the root zone.
- Nutrient salt buildup on soil or containers: A white crust forming on the top of the soil or around the edges of your container can indicate too much nutrient residue.
If you’re unsure, look up pictures of nutrient burns and compare them with your plant. Identifying what nutrient burns look like is key. The earlier you act, the easier it is to stop the spread and help your plant recover.
Now, let us understand the types of burns that occur on your cannabis plant.
Types of Burns on Cannabis Leaves
Each stage or type of burn presents its own symptoms, so knowing what to look for helps diagnose and prevents overcorrecting or worsening the situation. Some growers may confuse nutrient burn with other problems like light stress or deficiencies, which can delay proper treatment. Observing specific patterns and pairing them with consistent testing puts you in a better position to respond before permanent damage sets in.
- Tip Burn from Nitrogen Overload: The most common type begins with yellow or brown tips on weed leaves. This is typically caused by too much nitrogen. You’ll often see this during the vegetative stage when nitrogen demand is high, but excess levels overwhelm the plant.
- Root Zone Damage from Salt Buildup: Overfeeding and poor watering habits can cause nutrient salts to accumulate in the root zone. This buildup blocks oxygen and damages the roots. If your growing medium has poor drainage or you’re not flushing properly, the problem compounds fast.
- Toxicity that Mimics Deficiency: One of the most confusing symptoms is when nutrient toxicity causes signs that resemble a deficiency. For example, nutrient lockout due to extreme pH levels or salt saturation can make it look like your plant is missing nutrients when, in reality, it’s just unable to absorb them.
- Mid to Late Stage Burn: In more advanced cases, the burn spreads from the tips to the edges of the leaves. Leaves may curl, darken, and become brittle. This indicates that the toxicity is affecting more than just the surface. It’s impacting the plant systemically.
Because these symptoms can overlap with other issues, it’s important to regularly test your soil or water to distinguish between nutrient burn and deficiency. Visual cues and proper testing will help you zero in on the problem. Tools like PlanaCan make this easier by simplifying task scheduling.
Using customizable templates, you can define and automate your cultivation process. Each step can be outlined for specific strains or grow cycles, from planting to harvest. Once your templates are set, you can schedule tasks on a calendar with just a few clicks, keeping your workflow streamlined and consistent to help prevent problems early.
So, how do you fix your cannabis plants of leaf burns? Let us understand in detail.
How to Fix Cannabis Leaf Burn
So you’ve spotted brown tips on cannabis leaves or noticed some curling and clawing. That’s your plant sending distress signals. Here's how to reverse the damage and bring your growth back to a healthy path:
If you're growing in soil:
- Prune damaged leaves: Remove crispy or severely burned leaves. They won’t recover and may waste the plant’s energy, which could be used elsewhere.
- Flush the soil: Run pH-balanced water through the soil until it drains clear. This helps remove excess nutrients and salts from the root zone.
- Let the medium dry slightly: After flushing, wait for the soil to dry out a bit before the next feeding to prevent overwatering.
- Resume with a lighter nutrient mix: Reduce nutrient strength by 25 to 50 percent when you feed again. Monitor how the plant responds before returning to full strength.
- Test runoff pH and EC: Regularly test the water that drains out to ensure your root zone remains in the optimal range. This helps prevent further buildup and allows for more precise adjustments.
If you're growing hydroponically:
- Change the reservoir water immediately: Discard the current nutrient solution and refill with clean, pH-balanced water to give the roots a reset.
- Dilute your nutrients: After flushing, prepare a new solution at reduced strength. Keep your pH and EC within the target range to support healthy nutrient uptake.
- Observe new growth: Look for healthy, vibrant leaves at the top. That’s your sign the plant is recovering.
- Clean your system: Make sure pumps, lines, and reservoirs are free of salt buildup or biofilm, which can interfere with nutrient delivery.
In both setups:
- Track plant behavior: Keep an eye on posture, leaf color, and the rate of new growth. These are better indicators than relying on a set feeding schedule. A tool like PlanaCan supports this approach by providing a clear visual timeline for planning and tracking cultivation tasks.
It lets you plan months ahead while managing day-to-day work with a flexible calendar that allows you to adjust tasks as conditions change. Centralizing all information keeps everyone on the same page so nothing gets missed.
- Be cautious during flowering: Nutrient burns during flowering can stall bud development and lead to harsh, chemical-tasting smoke. Recovery at this stage takes longer, so prevention becomes even more important.
Now, let us discuss how we can prevent leaf burn and ensure the healthy growth of your cannabis plants.
How to Prevent Leaf Burn in Future
Dealing with nutrient burn once is enough. The real goal is to prevent it from happening again. Here’s how you can stay ahead of cannabis leaf burn with consistent, simple habits that support plant health:
- Maintain proper pH levels: Keep your pH between 5.8 and 6.5, depending on your growing medium. This ensures nutrients are absorbed efficiently, avoiding deficiencies and toxicity. Test your water and runoff regularly to keep pH levels consistent.
- Monitor nutrient strength: Use EC (electrical conductivity) or TDS (total dissolved solids) meters to measure nutrient levels accurately before feeding. These tools remove the guesswork from dosing and help ensure you aren’t overfeeding your plants. Maintain a nutrient strength appropriate for the plant’s growth stage.
To stay on top of these details, a tool like PlanaCan helps by providing a clear visual timeline for planning and tracking cultivation tasks. It lets you plan months ahead while also managing daily work. The calendar makes it easy to adjust ongoing tasks as needed, and with all information centralized, everyone involved knows what needs to be done so nothing gets missed.
- Tailor feeding schedules: Pre-made nutrient schedules can be helpful, but they are not one-size-fits-all. Adjust the schedule according to your plant’s strain, growth stage, and any signs of stress. Regular observation allows you to fine-tune your approach for better results.
- Mix nutrients carefully: Always mix nutrients in the correct order—typically starting with base nutrients, followed by additives—and ensure each one is fully dissolved before adding the next. Improper mixing can lead to chemical reactions that reduce nutrient availability or shock your plants.
- Use clean water sources: Make sure your water is free of chlorine, heavy metals, or other contaminants. Filtered or reverse osmosis (RO) water is often ideal. Clean water prevents hidden variables from affecting your pH, EC, and nutrient absorption.
- Flush periodically: Even when your plants appear healthy, occasional flushing with plain, pH-balanced water helps clear excess salts and nutrient buildup from the root zone. This keeps your growing medium clean and reduces the risk of future nutrient burn.
- Keep a grow journal: Record feeding schedules, nutrient levels, pH readings, and observations for each plant. Over time, this will help you spot trends, anticipate issues, and create a more customized care routine for your growth.
With PlanaCan, you can take it a step further by generating detailed reports for each harvest. It tracks your cultivation choices and how they affect your yield, all in one place. Reviewing these reports makes it easier to see what’s working, avoid past mistakes, and keep improving your process for better results each cycle.
Now, let's understand the diagnosis and recovery techniques that you can use to recover your plants from nutrient burns.
How to Recover From Burned Leaves
If your cannabis plant shows widespread symptoms, such as burnt and curling leaf tips, stunted or halted growth, dull or fading leaf color, and generally weak structure, it might be time to reset your approach.
Here’s what to consider:
- Full Flush: Thoroughly rinse the root zone using pH-balanced water. This helps eliminate any salt or nutrient buildup that may be causing toxicity. Make sure the runoff water is clear and within the ideal pH range.
- Prune Heavily Damaged Leaves: Remove leaves that are dry, brittle, curling, or discolored beyond recovery. This helps the plant redirect energy toward new, healthy growth instead of trying to sustain dying tissue.
- Rebuild with a Lighter Feeding Schedule: Once flushing is complete and the plant begins to stabilize, resume feeding at a reduced dosage. Start with about 50% of your regular nutrient mix. Observe how the plant responds over the next several days before adjusting.
- Monitor Environmental Stressors: Check for high temperatures, poor airflow, or light stress that may amplify the effects of nutrient burn. Stabilizing your environment can speed up the recovery process.
- Stay Consistent and Patient: Nutrient burn recovery takes time and patience. Avoid jumping back into full-strength feeding or aggressively pruning damaged areas right away. Doing too much, too soon, can further stress your plant.
So, how do you ensure a healthy growth environment for your cannabis plant? Let us understand this in detail.
Improving Growth Conditions
Nutrient burn often stems from more than just overfeeding. Sometimes, the real issue lies in your grow setup. A stable, well-maintained space lowers the risk of stress and encourages better nutrient uptake. Consider these key areas to improve your environment:
- Control temperature and airflow: Use grow tents or enclosed areas with well-designed ventilation systems. Maintaining a consistent temperature range (around 70 to 85°F) with steady air circulation helps prevent heat buildup and root stress. Oscillating fans, exhaust systems, and passive air intakes are useful additions.
- Improve root oxygenation: Traditional plastic pots can restrict airflow and hold excess moisture. Switch to air pots or fabric pots that promote better drainage and aeration. This reduces the chances of root rot and encourages a stronger root system.
- Automate your routine: Use timers for lighting, auto-irrigation systems for watering, and smart sensors for humidity, temperature, and pH monitoring. Automation reduces human error, eliminates overwatering or missed feedings, and helps you maintain a consistent routine with minimal guesswork.
- Use proper lighting setups: Select high-quality LED grow lights with full-spectrum output and adjustable intensity. Keep lights at an optimal distance to prevent light burn. Ensure even light distribution across the canopy so all plants receive adequate exposure.
- Keep the grow space clean and organized: A clean grow area deters pests, prevents mold, and limits the spread of pathogens. Regularly sanitize tools, pots, and surfaces. Remove fallen leaves and debris, and avoid clutter that can trap moisture or reduce airflow.
- Monitor humidity levels: Maintain relative humidity levels between 40 to 60 percent depending on the plant's stage. Low humidity can dry out plants and exacerbate burn symptoms, while high humidity can lead to mold and mildew.
- Minimize environmental fluctuations: Avoid dramatic swings in temperature, light cycles, or humidity. Sudden changes can shock plants and make them more vulnerable to nutrient stress.
Conclusion
Catching cannabis leaf burn early can be the difference between a quick recovery and a disappointing harvest. You can protect your plants from long-term damage by watching for early symptoms like brown leaf tips and clawing, adjusting your nutrient levels accordingly, and regularly testing your soil or water.
Success in cannabis cultivation is all about balance. Deliver the right nutrients at the right time, and stay consistent with your environment and feeding practices. If in doubt, rely on your meters and observation, not assumptions.
Consider integrating PlanaCan into your cultivation process to take your growth to the next level.
PlanaCan helps you streamline your growth by setting up repeatable workflows with customizable templates for each stage of cultivation, including cloning, veg, flower, and more. You can easily schedule and assign tasks, ensuring consistency and no missed steps.
PlanaCan gives you a clear view of past, current, and upcoming tasks, helping you plan ahead and make quick adjustments when needed. With its visual timeline and calendar, you and your team can stay organized and aligned every step of the way.
With PlanaCan, growers gain more control, reduce manual errors, and ensure every part of the grow is accounted for. Healthy plants thrive in well-managed environments, and PlanaCan provides the structure to make that happen.
Schedule a free call today and learn how PlanaCan can help you maximize yields and manage your grow with ease.