If you're a grower of cannabis, you know how frustrating it can be to try to keep your plants happy as they grow through all the different stages of growth. Whether you're a home grower or managing a more extensive operation, knowing how to monitor and maximize your plant's needs is essential to the production of a healthy, high-yielding crop. One of the most powerful tools you can have in your grow room is a cannabis grow chart.
In this article, we will describe the various phases of a cannabis plant, explain crucial growth charts and graphs, and teach you how to apply them to maximize yield and quality.
We will also discuss other fundamental concepts, such as PPFD (Photosynthetic Photon Flux Density) and CO2 supplementation, which are critical functions that help improve the ideal growth environment for your plants.
Understanding Cannabis Growth Stages
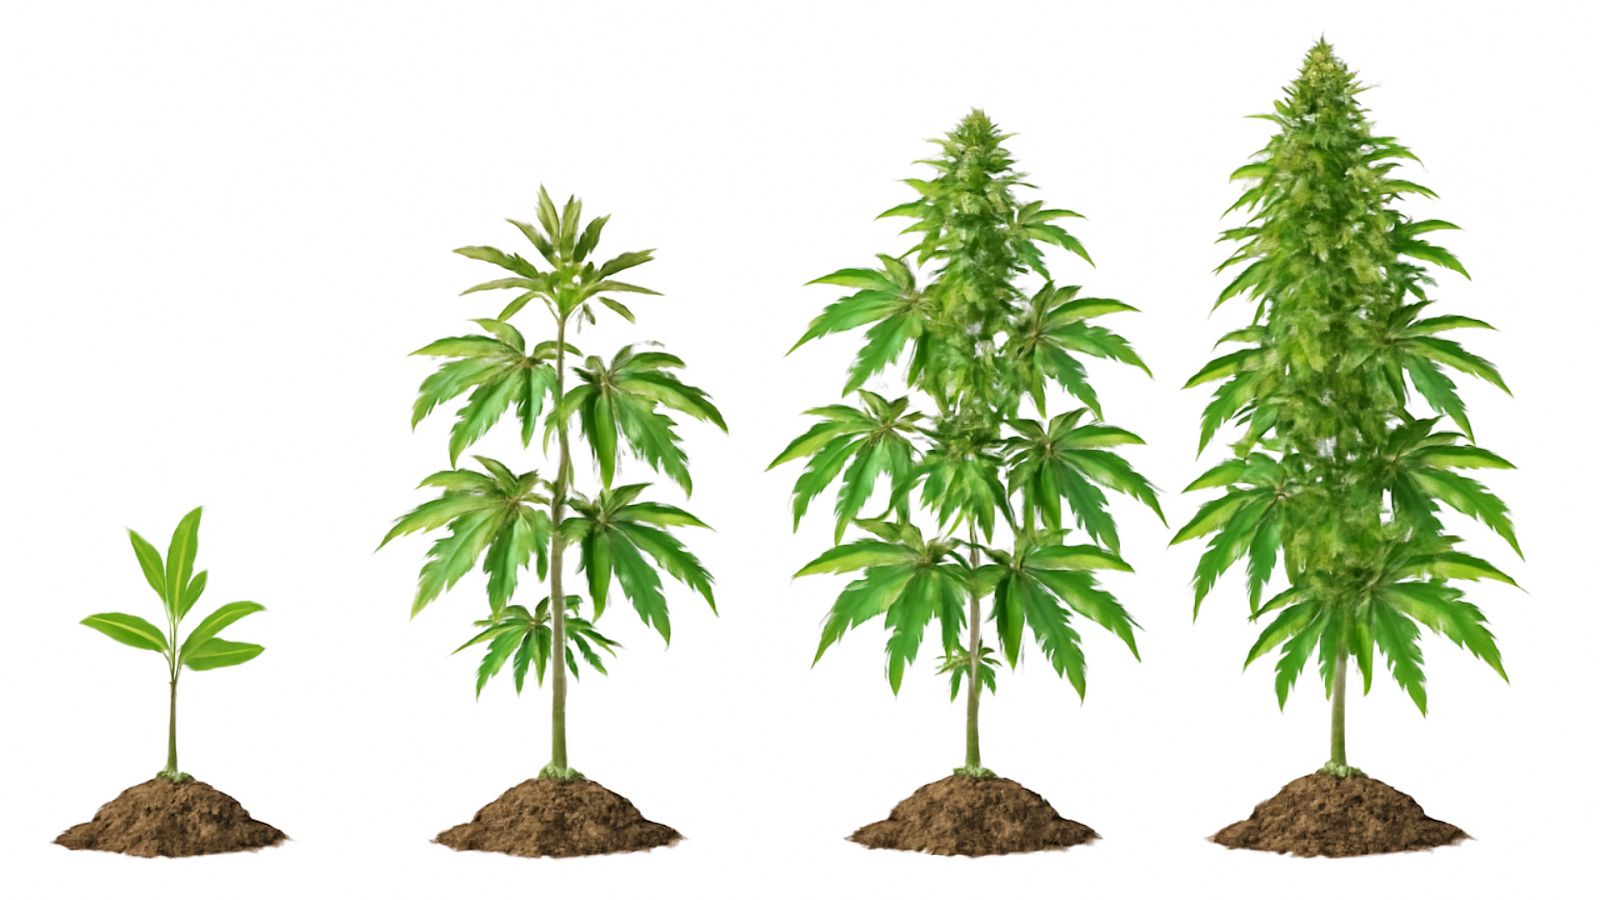
The lifecycle of a cannabis plant can be divided into seed germination, seedling, vegetative, flowering, and ripening. Each phase has different light, water, nutrient, and temperature demands. With this information on how your plants will proceed through the various stages, you can make better decisions about their care.
- Germination is the stage when the seed begins to sprout. At this stage, the plant does not require light; it only requires warmth and moisture to encourage the seedling to emerge.
- The Seedling Stage is when the plant first shows significant growth, developing its leaves and primary root system.
- Vegetative Stage is when the plant grows very rapidly. At this stage, it develops its stems, leaves, and branches. Healthy foliage is essential for photosynthesis and overall plant strength.
- Flowering Stage is when the plant starts producing buds. This is a critical period during which light cycles are involved, and nutrient levels must be carefully balanced to support bud development.
- Ripening Stage is the final stretch, during which the plant matures and buds reach their full potential. The goal is to achieve a 'harvestable peak of potency and yield'.
So, how important is it to know about each growth stage? Let us understand.
Are you tired of juggling multiple tasks and trying to keep track of every step in your cultivation process? PlanaCan can simplify your workflow and ensure that nothing slips through the cracks. PlanaCan allows you to define and automate your cultivation tasks using customizable templates. Whether it's planting, feeding, or harvesting, you can outline each step of the process for specific strains or harvest cycles. Once you have created these templates, you can schedule tasks onto a calendar with just a few clicks. This streamlined approach helps you maintain a consistent, efficient workflow so you can focus on growing your plants rather than managing endless to-do lists.
Importance of Distinguishing Between Growth Stages
Understanding and distinguishing between the different growth stages of cannabis is essential in maximizing both the health of your plants and the quality of your harvest. Here's why every stage matters and how it influences your growth overall:
1. Specific Nutrient Needs:
- Different growth stages require different nutrient profiles. Seedlings require very minimal nutrients, and while nitrogen is important later, it's best to use a light dose during early growth stages.
- Using a grow chart will allow you to adjust your nutrient schedule based on the needs of the plant at each stage, so you never over or underfeed.
2. Light Requirements:
- Seedling and Vegetative Stages: Cannabis plants need 18-24 hours of light to establish. A growth chart will help you determine the required light cycles.
- Flowering Stage: The light cycles should be reduced to 12 hours of light and 12 hours of darkness. The flowering stage is activated by this light cycle, and maintaining the appropriate light schedule is crucial to proper bud development.
3. Temperature and Humidity:
- Cannabis prefers warmer temperatures and higher humidity levels during the initial stages (germination and seedlings) to enhance root growth and the plant's overall health.
- As the plant matures, you should gradually reduce humidity levels and keep temperatures within an optimal range to prevent mold growth and promote stronger stems.
- Grow charts often note temperature and humidity ranges specific to each stage, which can help you monitor and adjust your grow environment for the best results.
4. Growth Rate and Size Expectations:
- Seedling Stage: The growth is slow, and the emphasis is on root development rather than vertical or horizontal growth.
- Vegetative Stage: It is the stage when the plant grows rapidly, and it is essential to observe for any problems such as nutrient deficiency or pests.
- Flowering Stage: The plant reduces its growth while channeling the energy to grow buds. You should realize that this makes it sensitive, and you don't overwater or give too much fertilizer because that's stressful and decreases the yield.
5. Prevention of Stress:
- Cannabis is highly sensitive to changes in environments. Failure to determine the stage results in stressing the plant as you go about growing the plant.
- Stress is known to result in low yields, delayed growth, or even hermaphroditism, the production of male and female flowers on the same plant, which can destroy a harvest.
6. Harvest Time:
- Knowing when your plants are in the flowering phase can help you better judge the perfect harvesting time.
- A grow chart helps you identify when the trichomes on your buds are at the ideal stage for potency and flavor, whether you want a more uplifting high or a relaxing effect.
So, what are the important growth charts and graphs at each stage of the cannabis cultivation process?
Essential Cannabis Growth Charts and Graphs
The cannabis grow charts can track the essential metrics of growth in your plant and thus will make it easier to optimize conditions. According to the growth stage, the charts vary in focus from light intensity to nutrient levels and the health of the plant as a whole. Here's how it works:
1. Seedling Stage: Key Metrics and Typical Chart RangesHarvest Time:
In the seedling stage, your plants are just starting out and highly sensitive to their environment. Cannabis grow charts for seedlings will help you track the following:
- Light Intensity: Seedlings require lower light intensity compared to adult plants. Utilizing light-level charts in PPFD units will prevent you from overexposing the seedlings.
- Temperature: The ideal temperature range is between 70-75°F (21 and 24°C). Excessive heat or cold will hinder growth.
- Watering: The seedlings require frequent but light watering. Overwatering can cause root rot. Charts will be used to monitor the moisture levels carefully.
During this stage, the plants establish their root systems; thus, it is essential to have moderate light, nutrient supply, and temperature conditions not to stress the plant.
At this early stage, PlanaCan helps you easily track moisture and light conditions. The interactive calendar offers a clear visual timeline for planning and monitoring tasks like watering and light exposure. You can schedule daily checks and easily change them if conditions change, thereby ensuring your seedlings are cared for consistently. The calendar centralizes all information in one place, so you and your team stay aligned, and no task is overlooked. With PlanaCan, managing moisture and light conditions becomes simple, keeping your plants healthy and on track.
2. Vegetative Stage: Light Requirements and Growth Patterns
During the vegetative stage, the plant will grow rapidly by putting out leaves and branches. A growth chart for the vegetative stage usually reflects:
- Light Intensity: Vegetative plants require a moderate to high light intensity. Charts usually recommend 200-600 µmol/m²/s of PPFD for healthy leaf and stem growth.
- Nutrients: Nitrogen is important for vegetative growth, and charts will guide you on how much nitrogen to use in your fertilizer mix.
- Watering: The plant will need more water as it grows, but it should be watered carefully to avoid overbalancing the soil's moisture.
At this stage, your cannabis plants will grow the infrastructure that supports eventual budding. Monitoring these variables with a growth chart will ensure robust vegetative growth.
3. Flowering Phase: Optimizing Light and Nutrients
The flowering phase is when your cannabis plants start developing buds. This is the most crucial phase for maximizing yield and potency, so it's critical to follow growth charts that track the following:
- Light Intensity: Cannabis plants require intense light during the flowering phase. PPFD values are usually in the range of 600-1,200 µmol/m²/s, depending on the strain and growing environment.
- Light Spectrum: When the plant begins to flower, the light spectrum should change. A cannabis grow chart for this stage will indicate that plants need more red and orange light, which promotes bud production.
- Nutrients: At this stage, the plants require more phosphorus and potassium to help with flower formation and bud development. Excessive nitrogen application inhibits bud production.
Charts will provide you with the ideal level of light, nutrients, and temperature to support flowering in your plant.
4. Ripening Phase: Adjustments in Light and Nutrient Supply
Your cannabis plants are nearing harvest at the ripening stage. This is the time to fine-tune lighting and nutrients to ensure they enhance the flavor, potency, and quality of the buds produced.
- Light Intensity: To avoid stressing the plant, light intensity should be reduced. PPFD values typically decrease to about 400-600 µmol/m²/s.
- Nutrient Adjustments: At this stage, decrease the nitrogen and increase the potassium to feed the buds for final growth. Many growers will also flush the plants to remove excess nutrients.
- Harvest Time: Use a cannabis grow chart to know when your plants are ready for harvest based on bud maturity and trichome development.
Are you struggling to keep track of your cannabis crop? Here’s the solution: PlanaCan lets you create specific schedules that meet your requirements. With a few clicks, you can streamline your workflow and get every job done at just the right time to minimize the human factor of error. This means you'll be more focused on caring for and nurturing your plants because PlanaCan focuses on scheduling and monitoring, giving you consistent quality cannabis each time.
Now that we know how to tackle each growth stage, let's understand PPFD and how to use it.
Understanding and Using PPFD Charts for Growth Optimization
PPFD is the abbreviation for Photosynthetic Photon Flux Density. It's the measurement of the amount of light reaching the plant per square meter per second, specifically light within the photosynthetically active radiation or PAR range.
In other words, it measures the amount of usable light your cannabis plants need to produce food through photosynthesis.
Why PPFD matters: The correct PPFD levels ensure that your plants receive the right amount of light for photosynthesis without being overstressed with excessive lighting, which negatively affects growth.
Measuring PPFD: Accurate measurement of PPFD usually requires a specialized light meter, but many high-quality LED grow lights come with incorporated measurements and recommendations for optimal levels.
So, how can you measure PPFD at different growth stages? Here’s how:
Optimal PPFD Levels for Different Cannabis Growth Stages
Understanding the light requirement at the different growth stages will allow you to appropriately modify your lighting scheme with regard to maximizing your yield and plant health.
- Seedling Stage (100–300 µmol/m²/s): The seedling is the initial phase of your cannabis and is sensitive to photostressing. Thus, reduce your PPFD, so plants grow slowly but surely. Slightly indirect or soft sources could be fluorescent bulbs or lower-energy LEDs.
- Vegetative Stage (400–600 µmol/m²/s): When your plants start to grow leaves and stems, they will require more light for photosynthesis as they grow fast. During this stage, you should increase PPFD to promote more photosynthesis, which will lead to healthy and vigorous plants. High-output LEDs, metal halide (MH) lamps, or full-spectrum LEDs are appropriate.
- Flowering Stage (600–1000 µmol/m²/s): This is where your plants require the most energy to develop buds. Increasing PPFD during the flowering stage helps in maximizing the yield while promoting dense, resinous buds. High intensity, such as HPS or top-tier LED fixtures, is commonly used during this stage.

Now that we know the requirements for PPFD levels at each growth stage, let's learn how to achieve the right levels.
How to Achieve the Right PPFD Levels
Achieving optimal PPFD levels doesn’t mean just adjusting your light intensity. Here’s how to maintain the correct lighting setup:
- Distance from Plants: The closer the light source, the more intense the light will be. During the seedling phase, keep your lights farther away to prevent burning, but bring them closer during the vegetative and flowering stages to optimize PPFD. Adjust your light according to the manufacturer’s recommendations.
- Light Duration: The duration of light exposure, or photoperiod, also affects your plants' growth. During the vegetative stage, most growers use a light cycle of 18 hours of light and 6 hours of darkness. During the flowering phase, you’ll switch to a 12/12 light/dark cycle to trigger bud development.
- Light Spectrum: A cannabis plant needs different wavelengths of light at each stage of growth. The blue spectrum (400-500 nm) encourages vegetative growth, while the red spectrum (600-700 nm) encourages flowering. Full-spectrum lights that combine both blue and red wavelengths are ideal for all stages.
- Reflective Surfaces: To maximize the effectiveness of your lights, place reflective surfaces, such as mylar, white paint, or panda film, around your grow area. These surfaces can redistribute light uniformly to ensure that every part of your plants receives usable light.
Are you looking for a way to simplify task scheduling and improve workflow efficiency? With PlanaCan, you can easily define and automate your cultivation processes using customizable templates. Whether you are planting or harvesting, you can map out each step for specific strains or harvest cycles. Once your templates are set up, you can schedule tasks with just a few clicks, ensuring a smooth and consistent workflow every time.
Now that we know how to keep the PPFD under check, let us discuss how CO2 impacts the growth of cannabis.
Determining CO2 Supplementation Needs
CO2 supplementation can have a very positive impact on growth in cannabis, enhancing photosynthesis and overall plant health and yield. It's critical to note that not every growing environment needs supplemental CO2, though.
It is strictly dependent on the intensity of the light, the size of the plant, and the stage at which it is being grown. Here's what you should consider:
- Light Intensity: Plants can only use extra CO2 if they are provided with enough light. So, if your grow lights are weak or insufficient, they will have minimal effect on using extra CO2. Therefore, high-power lighting configurations like HPS, LED, or MH lights usually accompany CO2 supplementation.
- Plant Growth Stage: During the vegetative stage, cannabis plants are actively growing and require more CO2 to fuel their development. In the flowering stage, CO2 can still be beneficial, but the plant's need for it may decrease slightly as it shifts focus to bud development.
- Grow Room Environment: The best place for CO2 supplementation is in a sealed grow room with controlled temperature and humidity. If your environment is too large or has poor air circulation, it may not be able to maintain the ideal levels of CO2 that plants need. A CO2 level of 1,000-1,500 ppm (parts per million) is typically optimal for cannabis.
- Growth Rate and Yield Goals: CO2 can be crucial to maximizing yield, especially in a controlled indoor environment.
- Cost and Equipment: Of course, CO2 supplementation requires some investment in equipment components, controllers, and monitoring systems. It does lead to impressive results, but one needs to balance the cost of installation and maintenance with its usefulness for growth.
So, how do growth charts help maximise cannabis growth?
Maximizing Yield and Quality
One important way of maximizing yield while preserving quality is through the optimal distribution of light across your cannabis plants. Here is why and how to optimize the light distribution:
- Equal Light Coverage: All your plants must be exposed uniformly to avoid areas with less intense growth. When light falls irregularly, parts develop poorly, reducing your general yield.
- Use Reflective Surfaces: Install reflective materials (such as Mylar or white paint) on walls and ceilings to direct light toward the plants, maximizing light use and minimizing light waste.
- Position Light Height and Angle: Place grow lights at the ideal height and angle so that light can penetrate all areas of the plant, especially the lower areas that do not receive enough light.
- Strategic Light Placement: If you use multiple light sources, place them so that they provide overlapping light coverage across your plants. This will ensure that no areas are left in shadow.
- Consider Light Spectrum: Use different light spectrums at various growth stages. Blue light promotes healthy vegetative growth, while red light encourages flowering and bud production. Adjusting the light spectrum can optimize plant development and improve yield quality.
- Regular Monitoring of Light Intensity: Use a light meter to monitor and adjust light intensity to ensure it remains within the optimal range for each growth stage. Too much or too little light can stress your plants and stunt their growth.
Are you having trouble monitoring your plant’s growth? Don’t worry. PlanaCan’s interactive calendar provides a clear visual timeline for planning and tracking your cultivation tasks. You can schedule work months in advance while efficiently managing your daily activities. You can also easily adjust ongoing tasks to stay responsive to changing needs. With all information centralized, everyone on your team can see what needs to be done, ensuring that no task is overlooked.
Gas Exchange and Material Conversion
1. Role of Gas Exchange in Plant Development
- Photosynthesis: Cannabis absorbs CO2 in its leaves, which, along with water, forms glucose, sugar, and oxygen through photosynthesis. This process is vital for growth, as it provides the energy needed for a plant to thrive.
- Respiration: Under conditions of darkness or when light is not available, plants respire, using oxygen (O2) and giving out carbon dioxide (CO2). The process enables the plant to utilize stored energy or sugars to produce energy for growth and development.
2. How Gas Exchange Facilitates Growth
- Energy for Growth: The sugar produced by photosynthesis powers all plant activities, from root development to blooming. Higher CO2 levels promote higher rates of photosynthesis and more rapid, robust growth.
- Nutrient Uptake: Adequate O2 means the roots can absorb or assimilate vital nutrients from either soil or hydroponic solutions. Ineffective oxygen status negatively impacts nutrient uptake, manifesting in weakened plant health.
3. Gas Exchange Optimization
- Ventilation: Good airflow will supply a constant amount of CO2 and O2. Keep your ventilation system circulating the air inside your indoor space to maintain the best gaseous exchange.
- Environmental Conditions: Temperature, humidity, and light intensity impact a plant's ability to exchange gases. Too high a temperature can shut down stomata, tiny pores within leaves that allow CO2 to penetrate them less readily. Maintaining an optimum environment supports gas exchange.
Understanding gas exchange and optimizing it within your cannabis grow will directly contribute to maximizing growth potential for a higher yield. By ensuring that your plant environment is healthy enough to take in CO2 and release O2, you're preparing them for healthier development and better overall performance.
Let's discuss some common issues that might occur when using grow charts and how to correct them.
Common Issues and Solutions For Grow Charts
Sometimes, growing cannabis can be a balancing act, and even the most experienced growers face challenges. Below are some common issues and practical solutions to keep your plants healthy and thriving:
1. Identifying and Correcting Nutrient Deficiencies
Nutrient deficiencies are a common issue that can significantly affect your plants' health and yield. Here's how to identify and fix them:
- Yellowing leaves (Nitrogen deficiency): If your leaves start turning yellow, especially at the bottom, it may indicate a lack of nitrogen. Solution: Use a nitrogen-rich fertilizer, but avoid overfeeding, as this can cause a nutrient burn.
- Purple stems (Phosphorus deficiency): When your stems start to turn purple, especially during cool weather, your plants may be phosphorus-deficient. Solution: Increase the phosphorus using a balanced mix of nutrients while avoiding over-fertilization, as this can harm the roots.
- Brown, crispy edges: If the edges of your leaves start turning brown and crispy, potassium could be the problem. Solution: Use potassium-rich fertilizers, but be careful not to overdo it since excess potassium can lock up the uptake of other nutrients.
- Leaf spots or curling: Spots or curled leaves usually accompany calcium and magnesium deficiencies. To restore balance and prevent further damage, add a calcium-mag supplement.
2. Managing Light Stress and Burn
Too much light or not enough light can cause plants to grow poorly or even experience plant burn. Here's how to manage it:
- Symptoms of light burn: If your plants have bleached or crispy tips, they are probably getting too much direct light. Solution: Change the distance of the light or reduce the intensity, especially when your plants are flowering, as they are more sensitive at this stage.
- Signs of insufficient light: Stretched, leggy plants with weak stems often mean your plants aren’t getting enough light. Solution: Ensure your light intensity is adequate for the growth stage, and adjust the height of your lights accordingly.
3. Managing pH Imbalances
Maintaining the right pH in your soil or hydroponic solution is essential for nutrient uptake. An improper pH can lock out vital nutrients. Here's how to troubleshoot:
- Low pH (Acidic conditions): If the pH level is too low, your plants might become nutrient-toxic. Solution: Apply lime or a pH-up solution to raise the pH and guarantee that your nutrients are well absorbed.
- High pH (Alkaline conditions): A high pH can prevent plants from uptaking particular nutrients, which could lead to deficiencies. Solution: Decrease the pH with a pH-down solution to maintain a suitable balance and allow proper nutrient uptake.
4. Avoid Overwatering and Root Rot
Overwatering is one mistake that can lead to root rot and numerous other problems. Here's what to look for:
- Signs of overwatering: Musty smell, yellowish leaves, or wilting are the signs of watering too much. Solution: Let your plants dry before watering again; ensure good drainage, and review your watering schedule to ensure it is appropriate for the environment.
- Prevention of root rot: Root rot happens when the roots are constantly submerged in water. Solution: Grow the plants in well-draining soil or grow medium and avoid watering too frequently. Adding air stones or increasing airflow helps keep the roots healthy.
Conclusion
Growing cannabis is an art and science, and knowing what contributes to healthy plant development is crucial for maximizing yields. Every detail matters in cultivating a robust crop, from managing light intensity and CO2 levels to addressing nutrient deficiencies and ensuring proper gas exchange.
That's where tools like PlanaCan come in. PlanaCan’s Harvest Analysis and Reporting feature enables growers to create reports rich in data for every growth cycle. This will help them monitor the health of their plants and make decisions based on real-time data.
Whether you are fine-tuning your light schedule, managing nutrient levels, or optimizing CO2 levels, PlanaCan delivers insights into more efficient growing processes and larger yields.
Schedule a free call today to elevate your cannabis growing efforts and achieve consistent, high-quality results.


