Week 3 of the flowering stage marks a crucial turning point in your cannabis grow. Your plant begins shifting from structural growth to full bud development. This transition happens fast, and it's easy to fall behind if you’re not paying attention. What worked during the vegetative phase or even during weeks 1 and 2 of flowering will not cut it now.
Your plant’s energy starts to funnel directly into forming flowers at this stage. You’ll notice rapid changes in structure, pistil formation, and early trichome development. But along with these changes comes a higher risk of stress. If you ignore what your plant needs right now, you can lose yield, reduce potency, or trigger unwanted issues like nutrient burn or mold.
Getting week 3 right is not about making big, dramatic moves. It is about fine-tuning your care, staying observant, and responding quickly to what your plant shows you. When you understand the role this week plays in the bigger flowering timeline, you gain control over the outcome.
Let’s examine exactly what happens in week 3, why it matters, and how you can confidently manage it.
What Is the Cannabis Flowering Stage Week 3?
To understand week 3, you first need to know the big picture of the flowering stage. This phase marks the end of vegetative growth and the start of bud production. It begins when you switch your light schedule to 12 hours on and 12 hours off. This change triggers hormonal shifts inside your plant.
Here’s a brief week-by-week table for cannabis flowering stages:
Week
Flowering Stage
Key Characteristics
1
Pre-Flowering
Stretching begins; early pistils appear
2
Early Flowering
Bud sites develop; white pistils grow
3
Bud Formation
Buds thicken; more pistils appear
4
Mid Flowering
Buds swell; resin production starts
5
Peak Flowering
Dense buds, strong aroma, trichomes form
6
Late Flowering
Buds mature; pistils darken and curl
7
Ripening
Trichomes turn cloudy/amber; harvest time approaches
8+
Harvest
Buds fully mature, ready for harvest
Since all the stages are important, week 3 is most crucial due to better growth potential. Let’s understand this is detail:
Why Is Week 3 So Important For Your Cannabis Cultivation?
Week 3 sets the stage for healthy growth, strong structure, and ultimately, a better yield. Here’s why you need to pay special attention to week 3 in your cultivation process:
- Your Plants Develop Their Structure: By week 3, your cannabis plants start to establish their main stem and branches. This structural foundation will support future growth and buds, so any issues now, like weak stems or poor branching, can limit your final harvest. You want to ensure your plants grow strong and balanced at this stage.
- Root System Expansion Happens Now: This is when the root system grows rapidly underground, anchoring your plants firmly and improving nutrient uptake. If roots don’t develop well by week 3, your plants may struggle to absorb enough water and nutrients later on. Helping roots thrive now will pay off during flowering.
- Nutrient Needs Change: Your plants shift from seedling-level nutrition to needing more balanced feeding during week 3. You should adjust your fertilizer mix to support healthy vegetative growth without causing nutrient burn or deficiencies. Paying attention to nutrient balance here can prevent problems down the line.
- You Can Shape Your Plants With Training: Week 3 is the ideal time to start plant training techniques like topping, low-stress training (LST), or pruning. These methods encourage better light penetration and airflow, resulting in bushier plants and more bud sites. Delaying training beyond week 3 often means missed opportunities for maximizing yield.
- Watch for Early Signs of Stress or Pests: Your plants become more resilient, but they are still vulnerable to stress factors like overwatering, light burn, or pests. Catching and correcting issues during week 3 means less damage and healthier growth moving forward. Regular monitoring at this stage saves you headaches later.
- Sets the Tone for Flowering Success: Week 3 essentially acts as a foundation week. Strong, healthy plants going into the flowering phase produce bigger, denser buds. Neglecting this period can reduce your crop quality and quantity.
So, what changes occur in your cannabis plant during week 3 of its flowering? Let us discuss below.
What Changes Occur to Your Cannabis Plant at Week 3?
By the time your cannabis plant reaches week 3, you’ll start noticing several important developments as it moves deeper into the flowering stage. Understanding these changes will help you optimize care and set the foundation for a healthy, productive plant. Here’s what you can expect:
1. Rapid Growth in Size:
By week 3, your cannabis plant is entering a phase of vigorous vertical and lateral growth. The main stem thickens and branches stretch out to support a wider canopy. This structural development is crucial because your plant is preparing to hold heavier flowers in the near future. The overall sturdiness of the plant increases to handle the upcoming demands of flowering.
What can you do:
- Use Structural Supports: As your plant grows taller and its branches expand, they can become vulnerable to bending or snapping under their own weight. To prevent this, place stakes, trellises, or soft plant ties around your plant to keep branches upright and stable.
- Apply Low-Stress Training (LST): Gently bending and tying down branches encourages the plant to grow horizontally, creating a more even canopy. This not only distributes the weight better but also maximizes light exposure for all parts of the plant.
- Monitor for Weak Points: Regularly inspect your plant for any stems or branches that seem weak or are drooping. Provide additional support immediately to avoid breakage, which could stunt growth or damage buds.
2. Node and Branch Development:
During week 3, you’ll notice an increase in the number of nodes, the points where leaves and branches emerge from the stem. These nodes are important because they become sites where buds will eventually form. The spacing between nodes (internodal spacing) becomes tighter, making the plant look bushier and more compact, which supports denser flower formation later.
What can you do:
- Support Developing Branches: Some of these newly formed branches may grow quickly but lack the strength to hold themselves up. Use soft ties or small stakes to gently prop up these branches, especially if you notice any sagging.
- Train Branches: Encourage balanced growth by bending and tying branches to create an even structure. This also improves airflow and ensures light reaches more parts of the plant.
- Inspect for Symmetry: Keeping your plant’s shape balanced helps prevent overcrowding in some areas, reducing the risk of mold and ensuring all buds get enough light.
3. Root System Expansion:
While the visible parts of your plant are growing fast, the root system is also expanding underground. Strong roots spread wider and deeper to anchor your plant securely and enhance its ability to absorb water and nutrients. This healthy root development supports the above-ground growth and improves overall plant health.
What can you do:
- Use Well-Aerated Soil: Roots need oxygen to grow well, so make sure your growing medium has good drainage and aeration. Avoid compacted soil that can suffocate roots or lead to root rot.
- Avoid Overwatering: Overwatering can drown roots and reduce oxygen availability. Let the soil surface dry out slightly between watering to promote healthy root growth.
- Consider Root Enhancers: Products like beneficial fungi (mycorrhizae) or root stimulants can support faster and stronger root development during this critical phase.
4. Larger and More Abundant Leaves:
Your plant’s leaves continue to grow larger and produce more fingers (the individual leaflets) per leaf, usually between 5 and 9. These broad leaves increase the plant’s photosynthetic capacity, generating more energy to fuel continued growth and upcoming flower development. Healthy leaves are your plant’s powerhouses, turning light into fuel.
What can you do:
- Check Leaf Color Regularly: Healthy leaves should be a rich, vibrant green. Yellowing, browning, or spotting may indicate nutrient deficiencies, pests, or environmental stress, and require your immediate attention.
- Remove Damaged Leaves: If you find leaves that are severely damaged, diseased, or turning yellow, prune them carefully to prevent spreading problems and improve airflow around the remaining healthy foliage.
- Promote Airflow: Make sure leaves aren’t overcrowded or overlapping too much, as this can trap humidity and increase the risk of mold or mildew. Good airflow keeps your plant healthy and reduces disease risk.
5. Increased Nutrient Requirements:
As your plant enters week 3 of flowering, its nutrient needs begin to shift. Nitrogen demand gradually decreases, while phosphorus and potassium requirements increase to support healthy bud development. This transitional phase calls for easing off high-nitrogen vegetative feeds and introducing bloom formulations with higher phosphorus and potassium to keep your plants thriving.
What can you do:
- Adjust Feeding Schedule: Consider increasing the frequency or concentration of your nutrient feedings to meet the heightened demand for nitrogen and other essential nutrients.
- Avoid Overfeeding: While providing enough nutrients is important, overfeeding can cause nutrient burn, damaging your plant’s roots and leaves. Use tools like EC (electrical conductivity) meters or ppm (parts per million) testers to measure and keep nutrient levels balanced.
- Observe Leaf Response: Watch how your leaves react to changes in feeding. Signs of toxicity include dark, curling leaves, while deficiencies might cause pale or yellowing leaves. Adjust nutrients gradually to avoid shocking your plant.
Tools like PlanaCan can make this easier by letting you create and automate cultivation schedules using customizable templates. You can map out every step from planting to harvest for each strain or cycle. With just a few clicks, you can track feeding and other tasks on a calendar, helping you maintain a smooth and consistent routine that keeps your plants healthy.
6. Monitor for Deficiencies:
Early nutrient deficiencies often show up first in the leaves as discoloration or spots. For example, yellowing leaves may indicate nitrogen deficiency, while brown spots might suggest calcium or magnesium issues. Detecting these signs early lets you act before serious damage occurs.
What can you do:
- Diagnose and Treat Quickly: Use leaf appearance as your guide and research the symptoms to identify the specific nutrient deficiency.
- Flush if Necessary: If you suspect nutrient lockout or salt buildup from overfeeding, flush your soil or hydroponic system with clean, pH-balanced water to reset nutrient availability.
- Use Balanced Nutrients: Choose fertilizers or nutrient mixes that provide a full range of macro- and micronutrients, ensuring your plant’s complete nutritional needs are met.
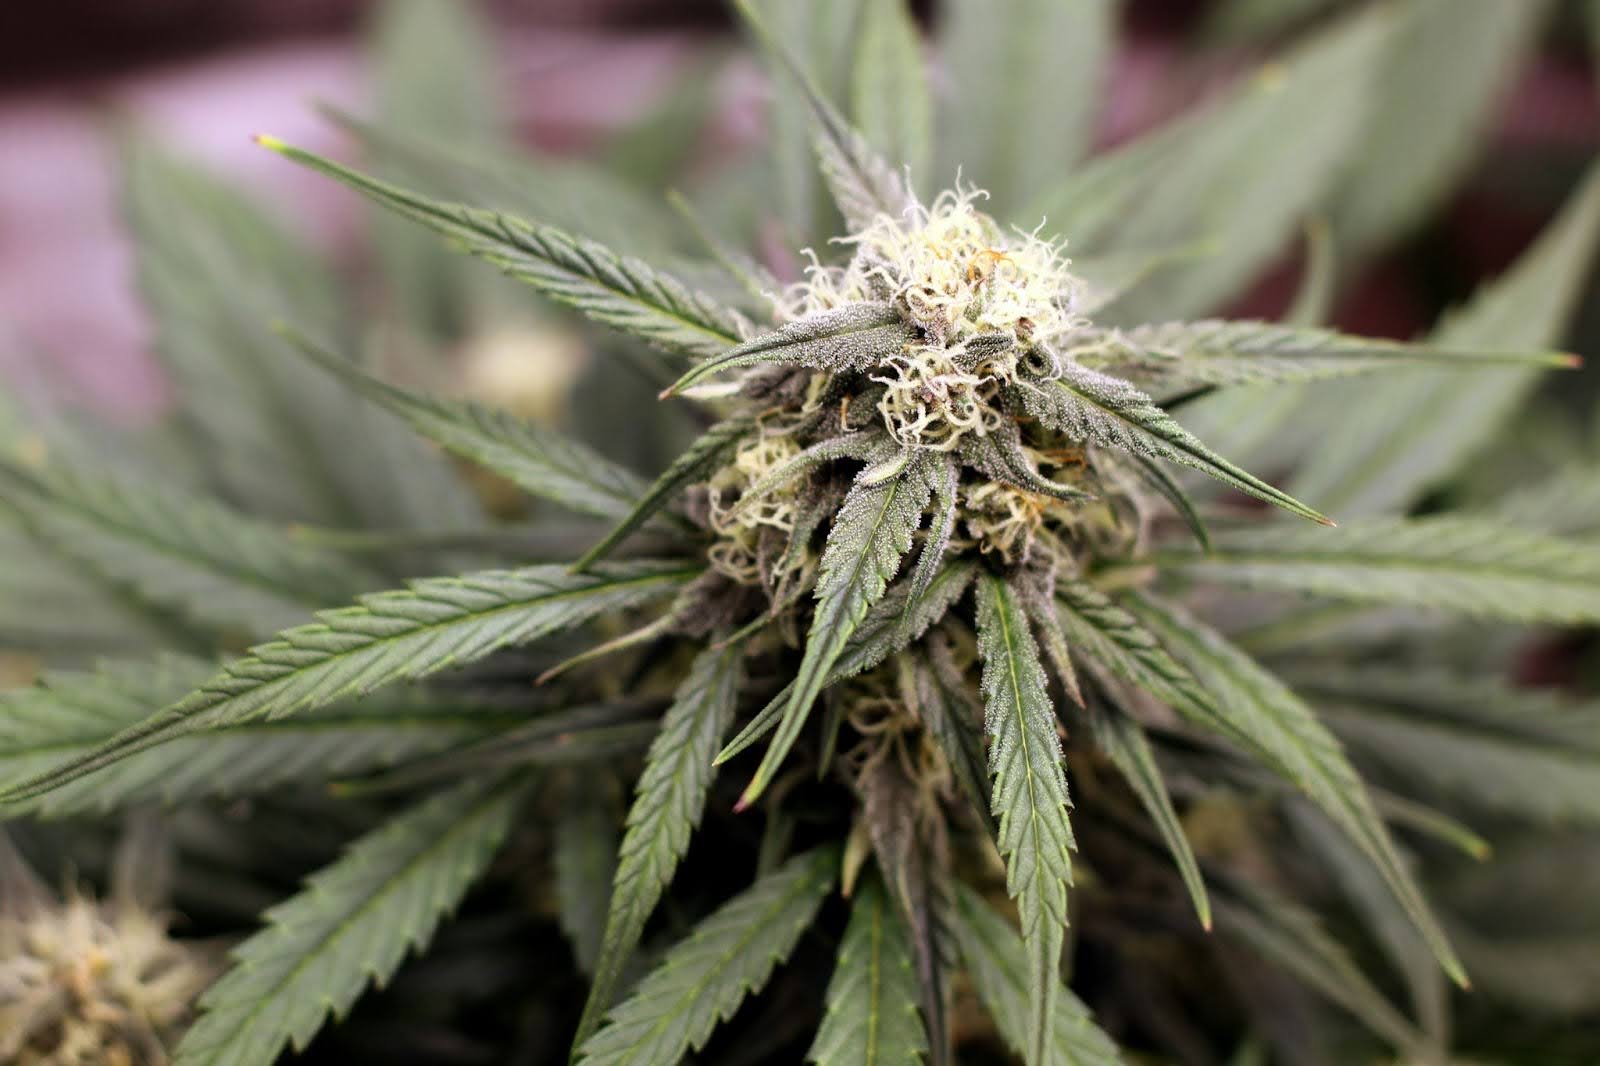
7. Early Bud Site Formation:
Depending on the strain and your lighting schedule, you may begin to see tiny white hairs, called pistils, emerging from the nodes. This is a sign your plant is entering the pre-flowering stage and shifting its energy toward producing flowers.
What can you do:
- Observe Light Cycle Carefully: Maintaining the correct light schedule is crucial at this stage. If you want to induce or maintain flowering, avoid light leaks or sudden changes that could confuse your plant.
- Avoid Stress: Minimize environmental stressors such as temperature fluctuations, low humidity, or inconsistent watering to prevent stunted or delayed flowering.
- Continue Training: The plant is still flexible enough to be trained gently. Use this opportunity to shape it so that flower sites get optimal light exposure.
8. Shift in Growth Focus:
Your plant gradually diverts more energy from leaf and stem production to bud development. This means fewer new leaves and more focus on creating dense, resinous flowers. Consequently, the ratio of leaf mass to bud mass begins to shift.
What can you do:
- Prune Excess Leaves: Remove fan leaves that block light from reaching the budding sites, improving light penetration and airflow around developing flowers.
- Encourage Bud Energy: By reducing unnecessary foliage, you help the plant channel more energy toward producing healthy, potent buds.
- Monitor Humidity Levels: As buds grow denser, they create pockets of higher humidity. Keep humidity in check to prevent mold or mildew from forming in these tight spaces.
Now, let us discuss the factors that affect week 3 of cannabis flowering below.
Factors Affecting the Cannabis Week 3 Flowering Stage
By week 3 of flowering, your cannabis plants are shifting their energy from vegetative growth to budding. This is a pivotal point in the flowering cycle where your plants are now forming the foundation for future yields. How you care for them during this week can make or break your harvest. Here are the most important factors you should monitor closely:
- Light Exposure and Intensity: Light is one of the most critical elements during the flowering phase. By week 3, your cannabis plants are highly light-sensitive, and they rely on strong, consistent light to produce energy for bud development. An improper light schedule or intensity can lead to uneven flowering, stunted buds, or even stress the plant into producing hermaphroditic traits.
Tip: Use full-spectrum grow lights, which mimic natural sunlight, to stick to a 12/12 light-dark cycle. Keep LEDs or HPS lights at the appropriate distance (typically 12–18 inches for LEDs) to avoid light burn or stretching. Use a timer to maintain strict light cycles—interruptions can confuse your plants and slow down flowering.
- Nutrient Balance: As your plants move deeper into flowering, their nutritional needs change. While nitrogen was essential during the vegetative stage, now the plant craves more phosphorus and potassium to build strong, resinous buds. Overfeeding or underfeeding during this time can affect bud size, aroma, flavor, and potency.
Tip: Transition to a bloom nutrient formula with reduced nitrogen and elevated phosphorus and potassium. Watch for signs of nutrient deficiencies like yellowing leaves or burnt tips. A weekly flush with pH-balanced water can help avoid nutrient buildup in the soil or medium.
- Temperature and Humidity: Environmental conditions play a huge role in cannabis flowering. If it’s too hot, your buds can become airy and lose terpene richness. If it’s too humid, you risk mold and mildew, especially as bud density increases. The key is to maintain a stable and controlled grow space where your plants feel safe and optimized for growth.
Tip: Ideal temperature during lights-on should be 68–78°F (20–25°C), dropping slightly during lights-off. Humidity should hover around 40–50%. Use a hygrometer to track levels and a dehumidifier or humidifier to make adjustments as needed. Proper environmental control now can save you from big problems later.
- Watering Practices: Your plants become thirstier during flowering, but overwatering remains a common mistake. Watering too often or too little can cause root problems, nutrient lockout, and slow growth. To strike the right balance, consider your growing medium and container size. Adjust watering frequency and volume accordingly, watering until you see slight runoff and allowing the topsoil to dry out between watering sessions to promote healthy roots and optimal growth.
Tip: Check the top inch of your soil or medium, if it’s dry, it’s time to water. Use pots with drainage holes, and allow runoff to escape freely. Always water with pH-balanced water (6.0–6.5 for soil, 5.8–6.2 for hydro/coco) to ensure your plant can absorb nutrients effectively.
- Air Circulation and Ventilation: By week 3, your buds start forming and cluster, making airflow even more important to prevent moisture buildup. Poor air circulation can cause mold, powdery mildew, and even attract pests. Your plants also need fresh CO₂ to photosynthesize and grow strong.
Tip: Use an oscillating fan to keep gentle air movement around the canopy and lower areas. Ensure your exhaust system is working well to replace stale, humid air with fresh air. If possible, use an intake fan to help pull in cooler air from outside the grow tent or room.
- Stress Factors: Stress can severely delay flowering or even turn your plant into a hermaphrodite. This includes physical stress (like excessive pruning or training), pest attacks, or environmental stress (temperature swings, light leaks). At this stage, your goal should be stability and minimal disruption.
Tip: Avoid high-stress training after the second week of flowering. Handle your plants with care, especially when watering or inspecting them. Check daily for pests and signs of disease. If any light leaks into the grow area during the dark cycle, fix it immediately. Plants are especially sensitive to light interruptions now.
To make things easier, PlanaCan keeps track of your growing decisions and how they affect your harvest. It puts everything in one place so you can look back, see what worked, and make better choices moving forward. Over time, it helps you grow healthier plants and get better yields.
- Genetics: Genetics determines how your plant behaves during flowering—how fast it matures, how it reacts to nutrients, and what kind of bud structure you can expect. Some strains are naturally more sensitive, while others are hardy and forgiving.
Tip: Choose strains known for stable genetics and good flowering characteristics. Indica-dominant strains tend to flower faster, while sativas may need a longer timeline. Understand your strain’s profile so you can anticipate needs and tailor your care accordingly.
Clear Troubleshooting Quick-Guide
Here’s a clear troubleshooting quick guide you can add at the end, summarizing common problems and quick fixes for week 3 of flowering:
Problem
Cause
Quick Fix
Mold or bud rot
Dense buds + high humidity
Improve ventilation and lower humidity
Nutrient deficiencies
Incorrect nutrient balance
Reduce nitrogen, increase phosphorus & potassium
Overwatering
Too frequent watering or excess volume
Water less often, allow topsoil to dry out; water until slight runoff
Slow growth or nutrient lockout
Root issues from overwatering or poor soil drainage
Adjust watering technique and check soil drainage
Leaf yellowing or curling
Nutrient imbalance or stress
Adjust the feeding schedule, monitor environmental conditions
Expectations for Week 4
Moving into week 4, you’ll see a further slowdown in stretch and a clear increase in bud density. Pistils continue to darken and curl, while trichomes multiply and start turning cloudy. This stage requires careful monitoring and possible adjustment in nutrients and watering frequency.
The plant’s energy is fully behind flower formation now, so it’s crucial to keep stress minimal. Proper airflow and maintaining environmental controls help avoid issues like bud rot.
Conclusion
Week 3 of the flowering stage isn’t just another point on the timeline. It’s a make-or-break moment for your cannabis grow. This is when your plants shift into high gear, and the foundations you’ve laid start showing real results. Understanding what’s happening beneath the surface and adjusting your care routine accordingly can mean the difference between average buds and a top-shelf harvest.
Getting this week right sets the stage for fatter colas, deeper aromas, and peak potency. But managing all the moving parts, like watering, nutrients, humidity, and light cycles, can get overwhelming fast.
That’s where PlanaCan comes in. It takes the guesswork out of cultivation and puts you in full control of your grow. With intuitive tools designed for cannabis growers, PlanaCan helps you track and optimize every detail of your flowering phase, from precise feeding schedules to environment control and growth milestones.
You can create tailored templates for different strains, automate repetitive tasks, and visualize your entire flowering cycle on a dynamic calendar. It’s perfect for solo growers and grow teams alike. Everyone stays on the same page, and no step is missed.
So if you’re ready to maximize your yields, reduce stress, and bring consistency to your grow, PlanaCan’s got your back.
Schedule a free call today and take the next step toward cultivating with confidence.